Hello fellow tubies and their friends and family! Adjusting to life on external feeds can be overwhelming and there are many details to organizing your life outside of just flushing and feeding. Get ready to learn some external feeding LIFE HACKS, feeding tube lessons learned and stories in our Adventures in Tubeland Blog, and links to educational articles. This website is NOT INTENDED to be medical advice and your doctor’s recommendation are always to be followed. THIS WEBSITE IS STILL IN PROGRESS OF BEING CREATED
Taking medications on a G-tube can be overwhelming and feel like it a huge constant time suck. To help with this, my husband and I decided to follow a routine where we crush/prepare med cups at most every 4 days and fill med syringes every other day.
I cannot recommend enoughgetting a high quality crusher, like a Silent Knight.
These tricks and tips will hopefully free you up from feeling like you’re always preparing medications, save your wrists, and save you some headaches.
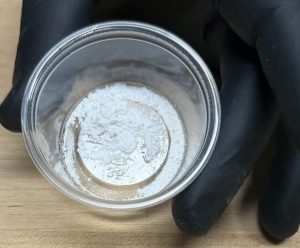
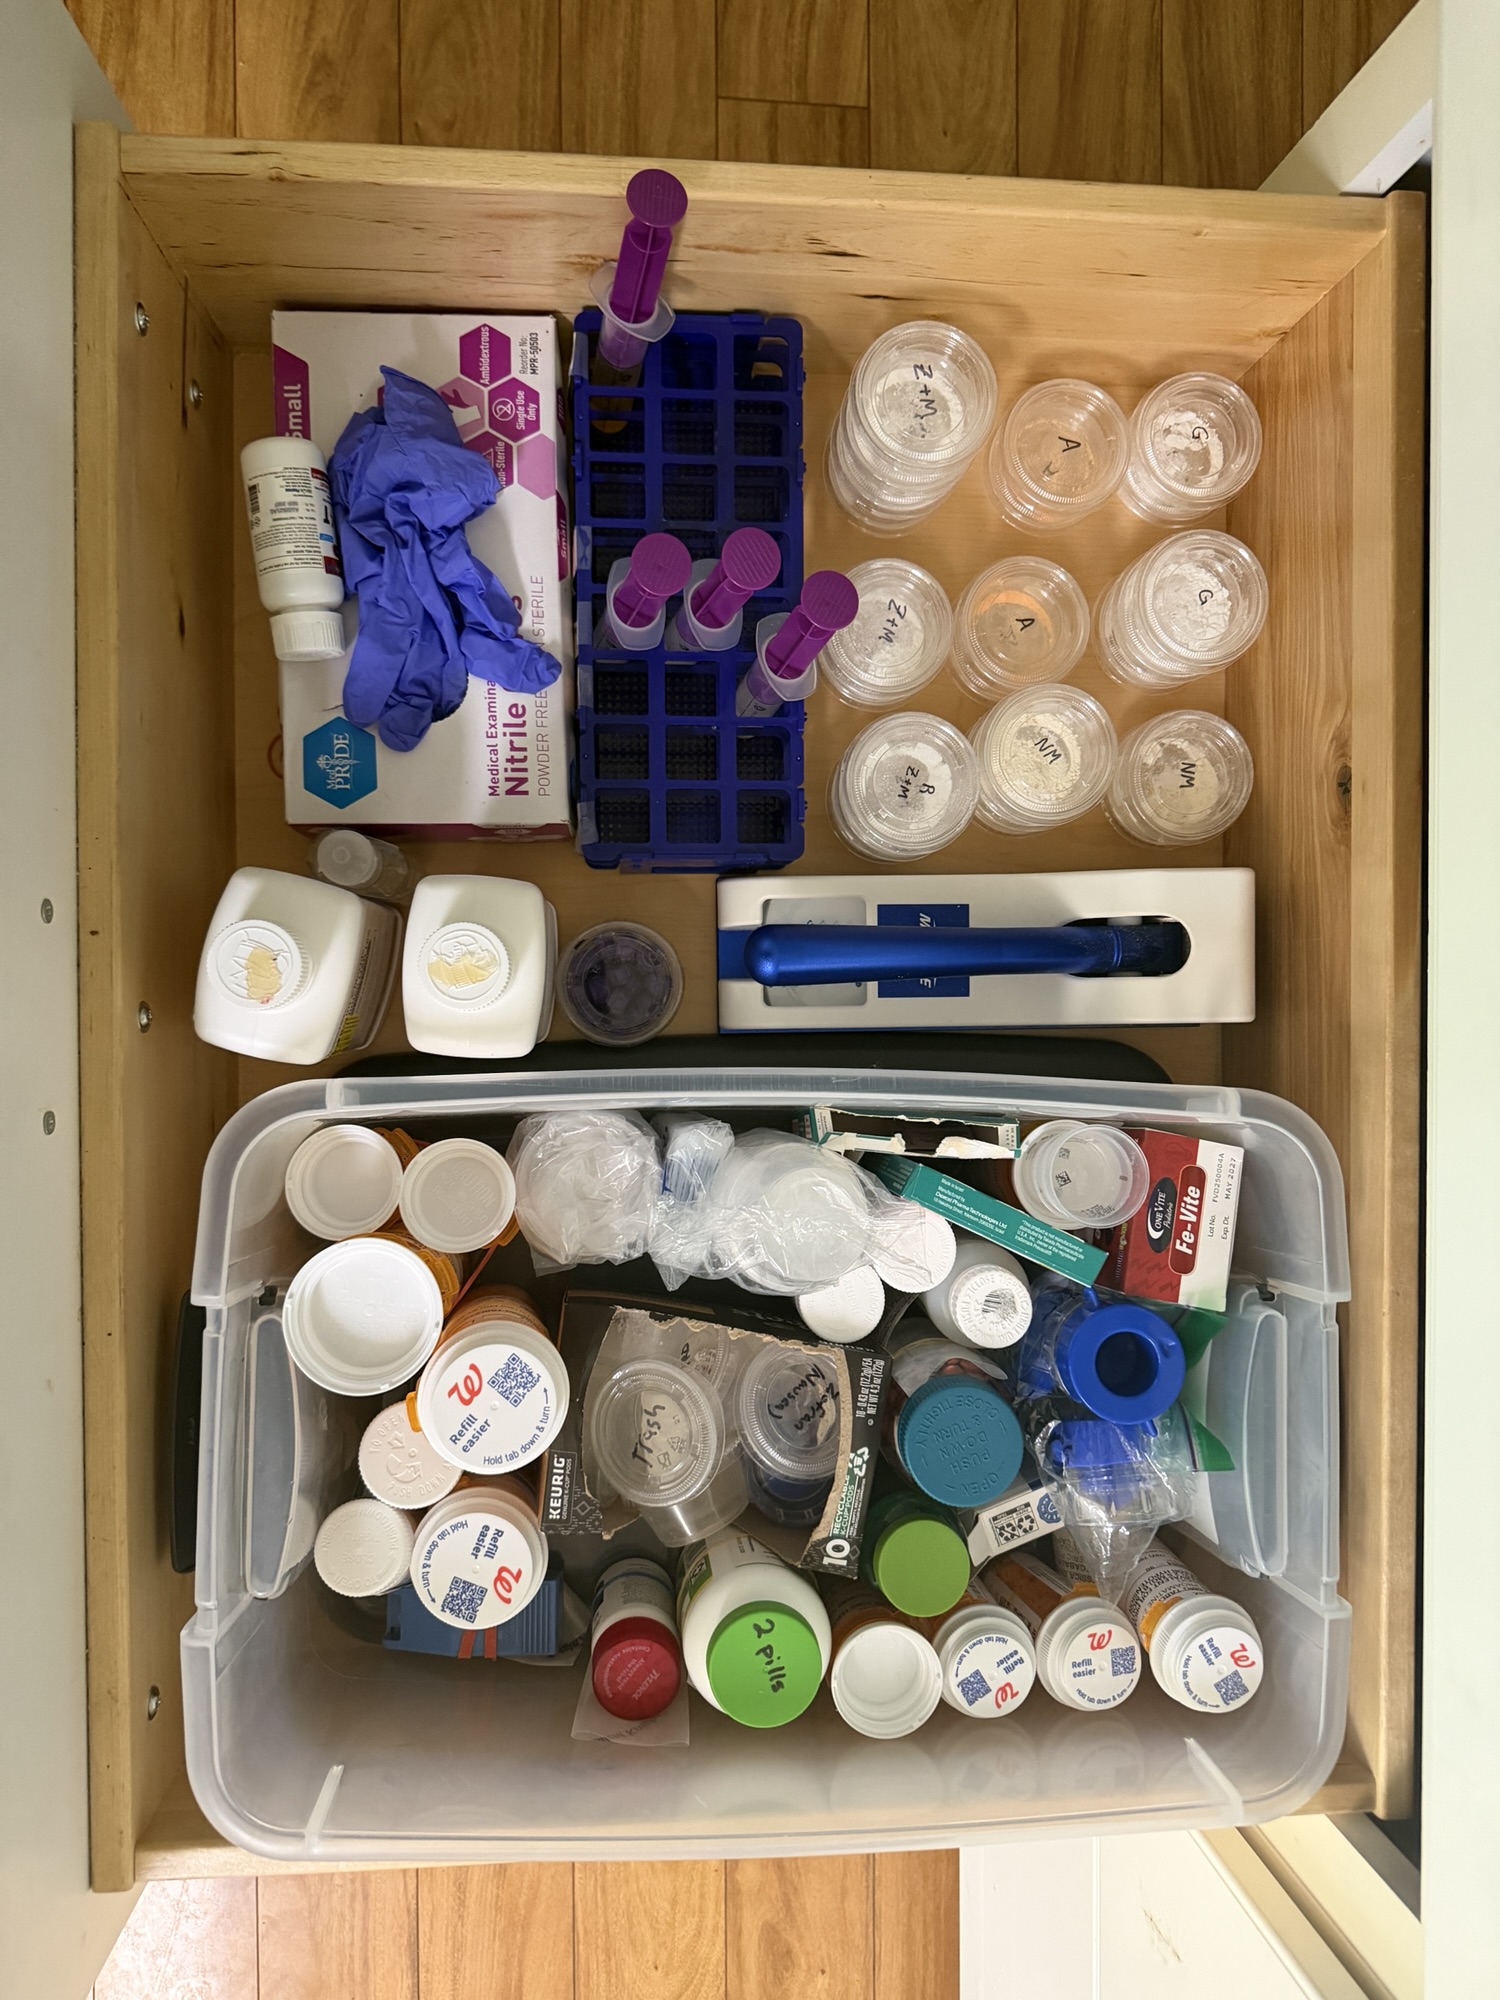
2oz “jello shooter” cups work great for mixing powdered medications, storing crushed prepared meds, and they can be cleaned and reused.
Tip: If traveling, label an associated sleeve for each cup of pre-crushed medication you will be bringing with you.
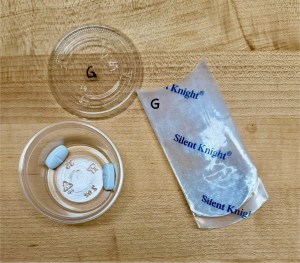
Label one cup lid for each med dose.
Label the lid with an abbreviation for the medication(s) crushed inside.
Zofran”, “R+M”, “Night Meds”, etc.
You can combine multiple meds in one cup/syringe as long as the powder volume isn’t too large.
Bottoms are interchangable, no need to label.
Step 2 : Crushing Tablets and Adding Capsules
My nurses have told me improperly crushed medications or trying to do too much powder in one syringe are the most common causes of tube clogs.
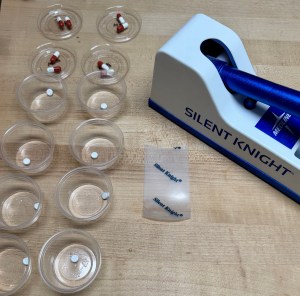
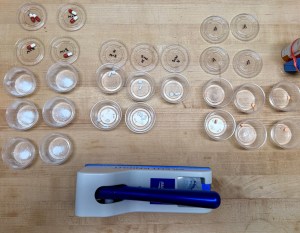
Organizing your cups and sorting your pills before you get started crushing is essential to not getting lost and missing or doubling doses.
Verify medications are NOT time released. Time release medications should not be crushedand administered via G/GJ/J tube unless EXPLICITLY stated to do so by the pharmacist and your doctor. Always double check! Crushing will cause you to get the entire time released dose at one time instead of spread out over the extended time as intended.
Place one cup per dose (syringe), in groups by med type.
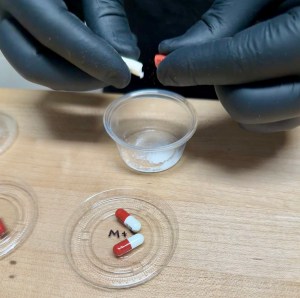
Place all pills and capsules for one syringe in one cup. Verify all medications are correct in all cups prior to proceeding.
Place the associated lids label down and any associated capsules on them.
Using your preferred crusher, make sure tablets are finely ground into a powder.
Pill coatings are the hardest to breakdown. Crush thoroughly.
If reusing sleeves, keep them separated by med type/group
Open capsules into the associated cup and put a lid on it right away.
It is too easy to forget which ones you have added the capsules to if you don’t cap it!
A good pill crusher saves time and does a good job of getting the powder extremely fine and saves your wrists!
Step 3 : Prefilling Crushed Medication Syringes
During crushing, pulling into the syringe, and administering some residue will be left behind. Many people require slightly higher prescription dose of medication on tube feeds because of this loss.
Syringe Volumes Used
20ml
60ml
Soak H2O
10ml
15ml
Rinse H2O
5ml
15ml
Pills
1 Lg 2-3 S
2 Lg 3-5 S
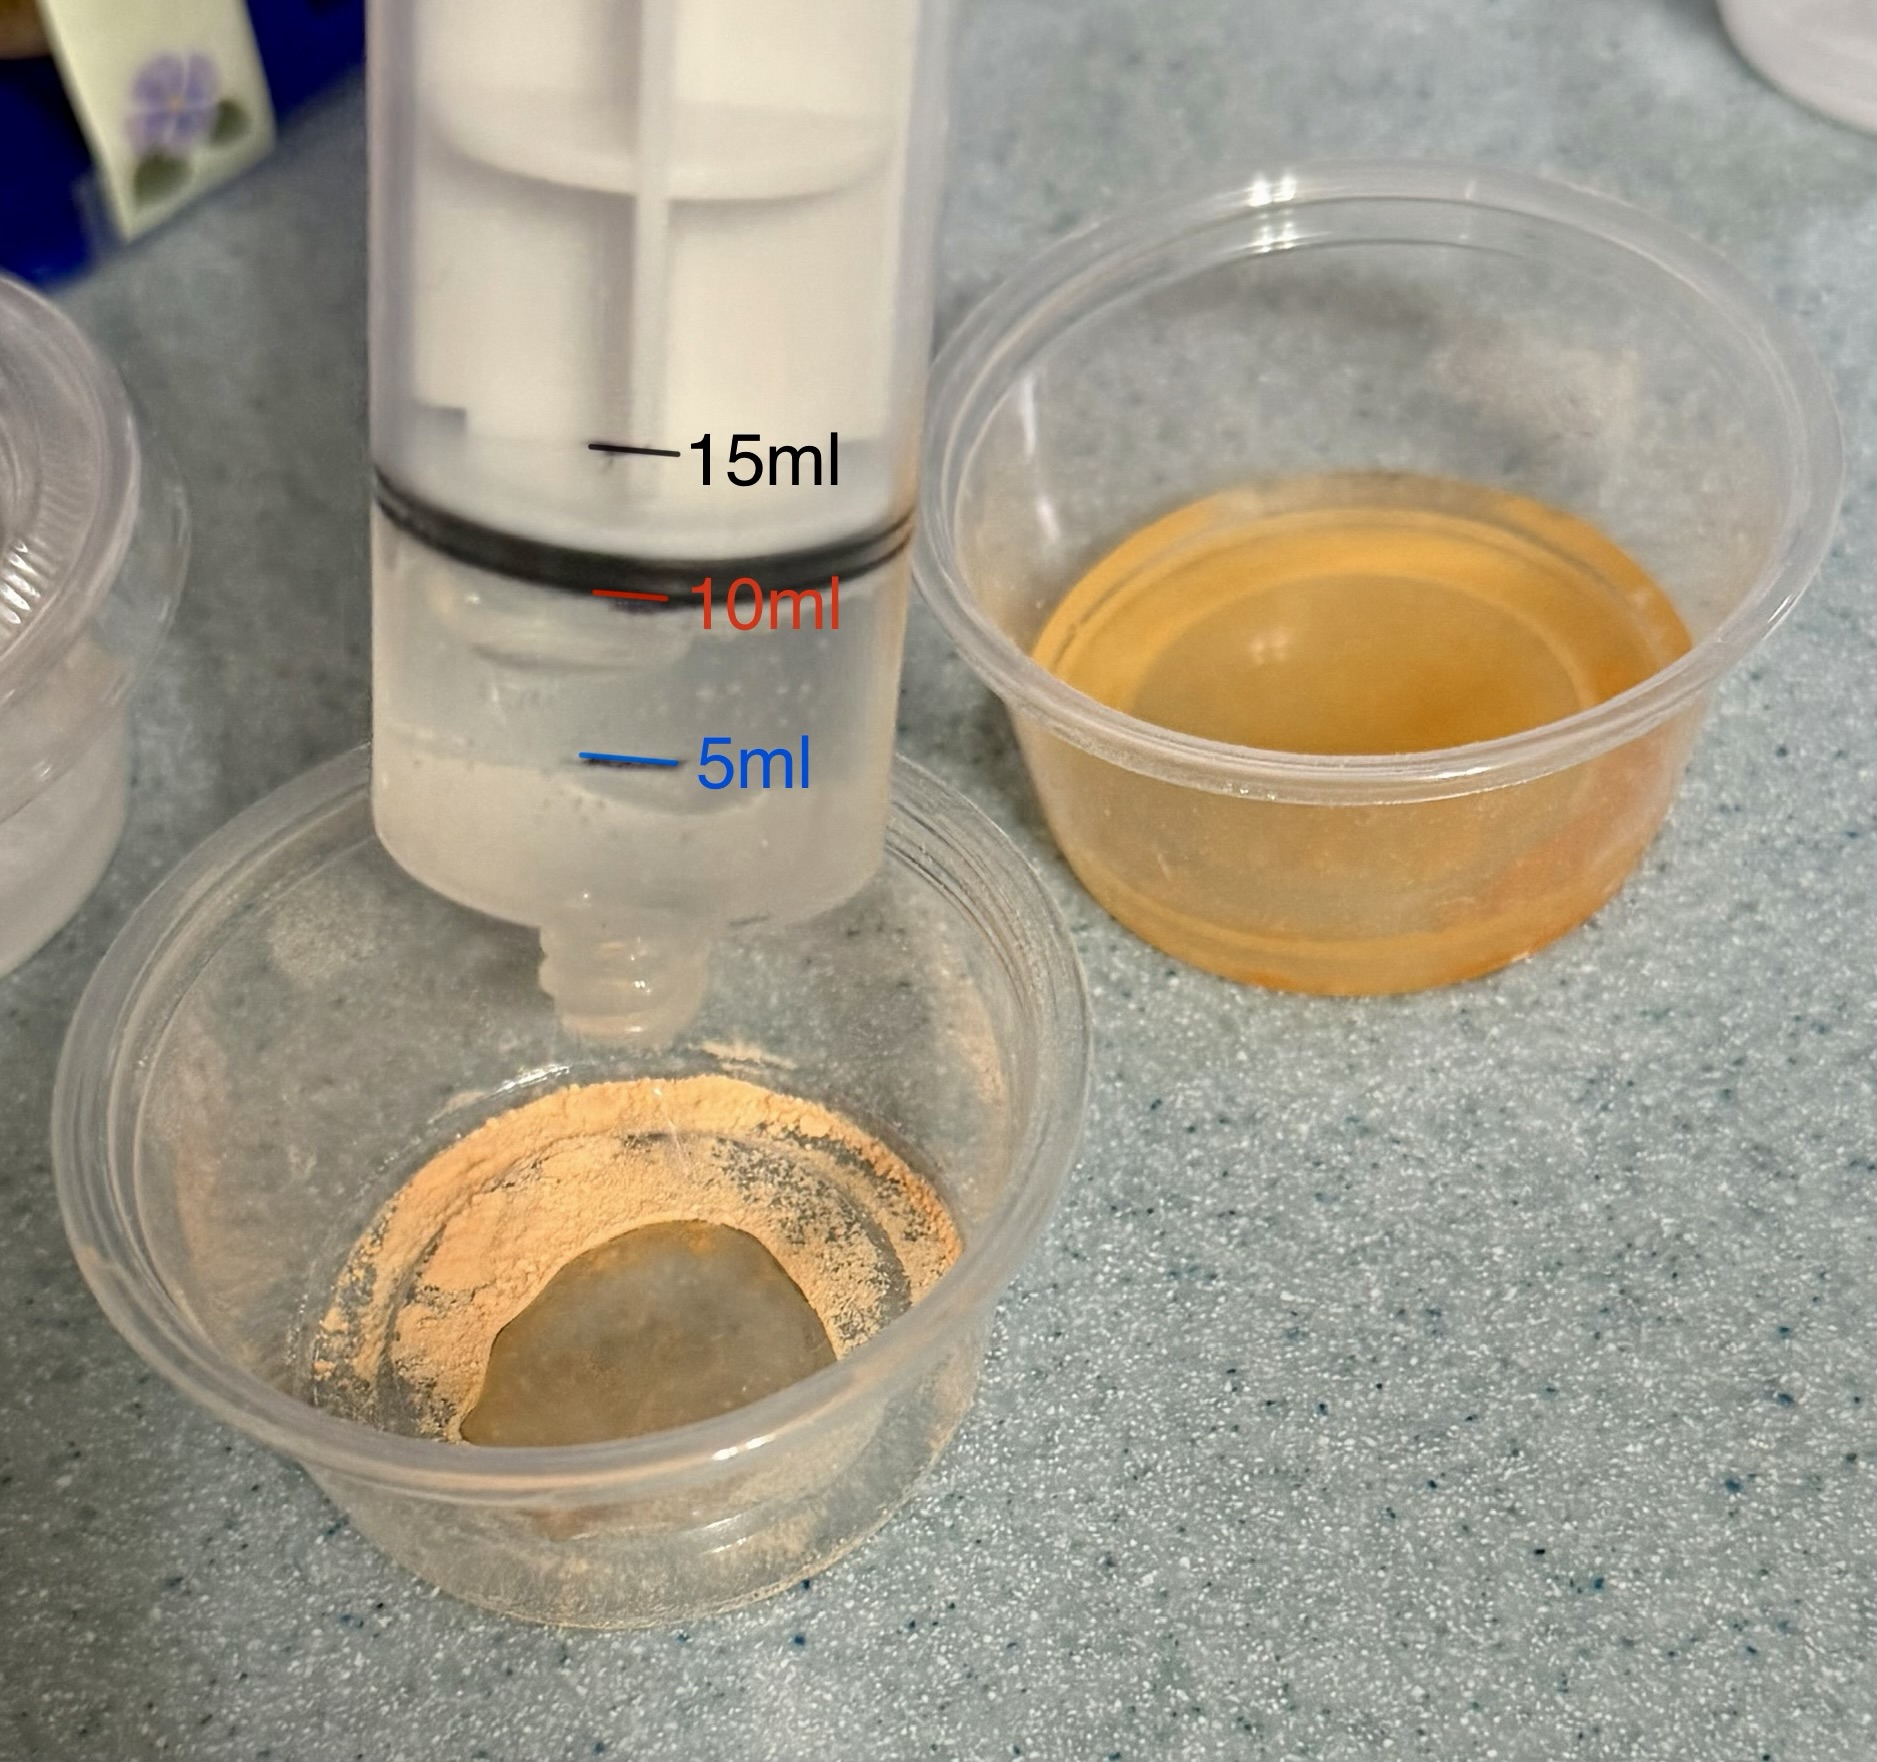
The proper syringes and soaking makes med prep more successful. We generally use 20ml and 60ml offset tip syringes for crushed medications dissolved in water.
Add initial water* to the cup of powdered meds, cap it, let it soak for 15+ minutes.
After sitting, mix the medications and water with the tip of the syringe.
Suck up as much of the solids from the bottom, remembering to run the tip of the syringe along the bottom cup corner.
Place the syringe tip up, pull the plunger back to clear the tip, tap, and push air out.
Rinse* the tip of the syringe and the sides and bottom of the cup to get the remaining residue off.
Suck up as much of the residue rinse as you can.
Place the syringe tip up, pull the plunger back to clear the tip, tap, push air out, and place a cap on.
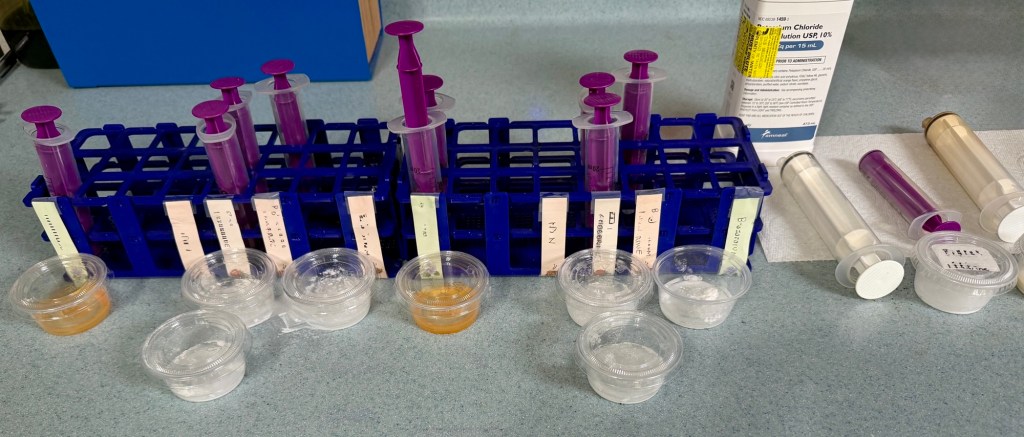
Place into a labeled slot or ziplock bag with medication identifier.
Step 4: Prefilling Liquid Medication Syringes
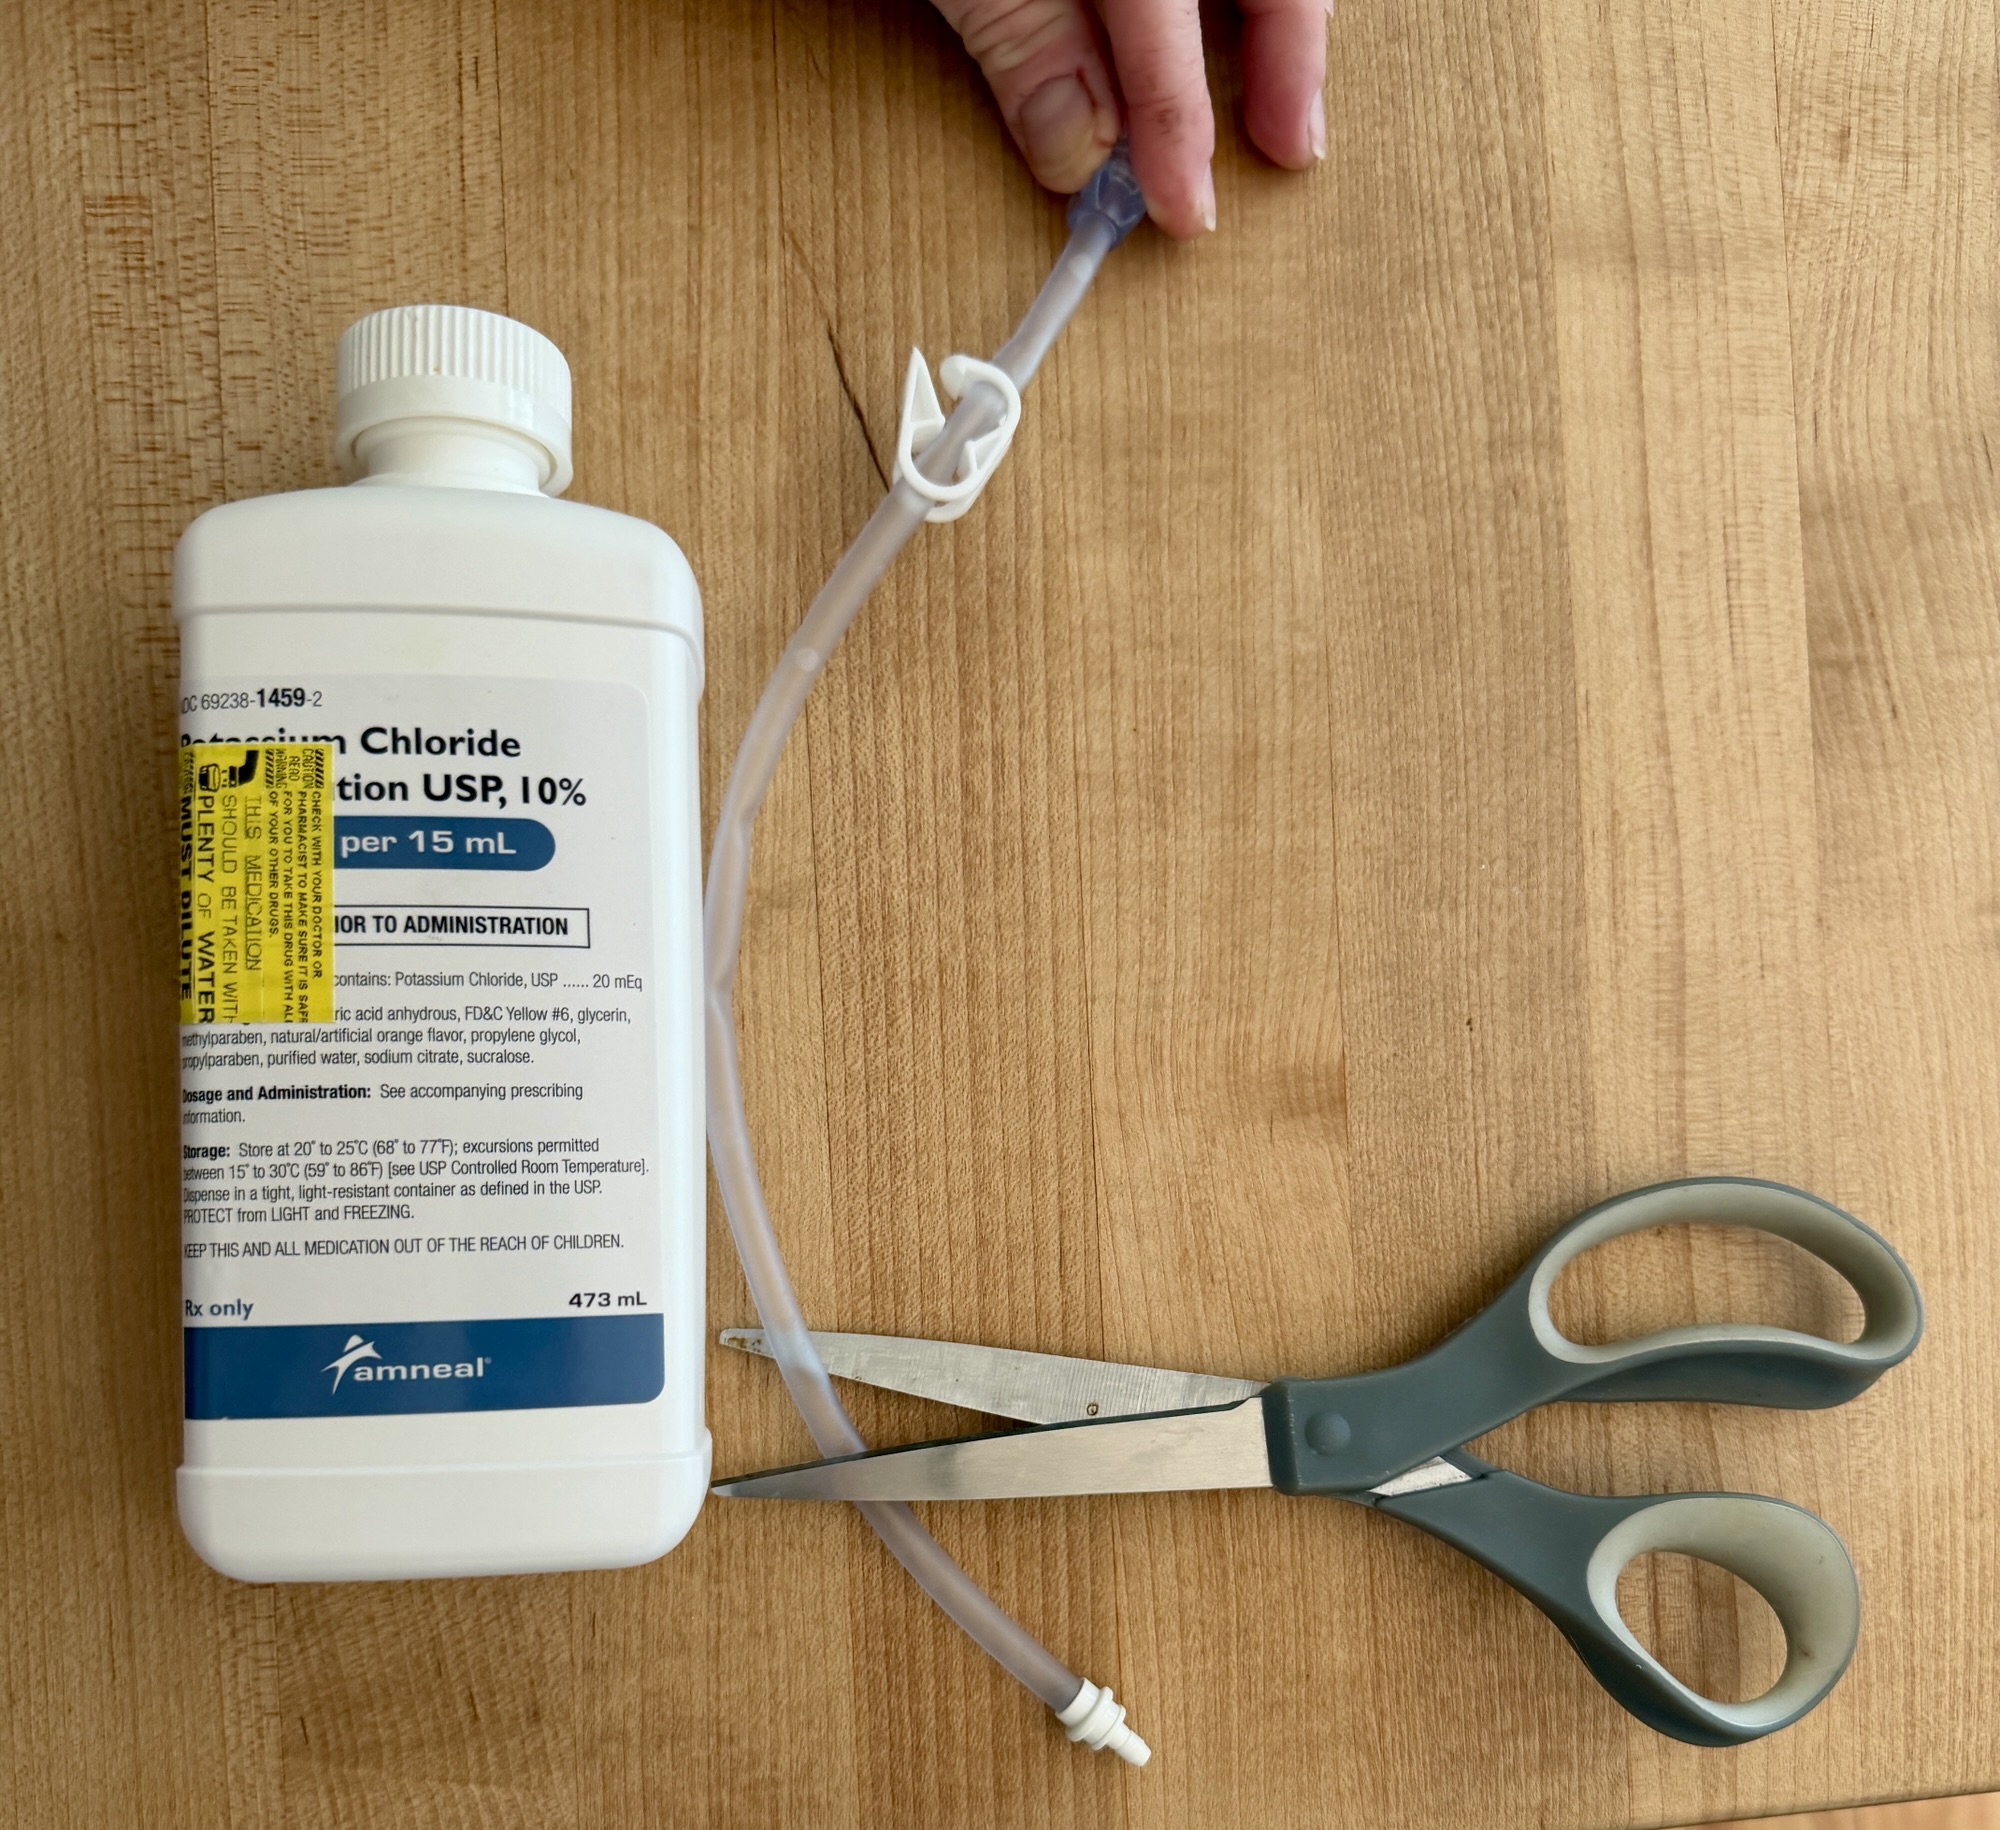
Make a Med/Food Straw
Cut the tube attachment off an extension but leave the syringe attachment and enough tube length to reach the bottom of the med bottle.
Some liquids are easiest to draw up using a “med/food straw” while others work best with a bottle to ENfit adaptor.
Using a med/food straw for larger volumes:
Attach a syringe to the end of the med/food straw.
Place the tip of the straw into the medication and pull the medication into the syringe. Clamp the extension and remove the syringe. Tap and remove air.
Reattach a syringe and fill up to the appropriate line. Repeat for all syringes.
Detach the last syringe, release the clamp, and let the remaining medication in the tube drain back into the bottle.
Place tip of syringe in water and pull back to dilute if desired.
Place the syringe tip up, pull the plunger back to clear the tip, tap, push air out, and place a cap on.
Place into a labeled slot or ziplock bag with medication identifier.
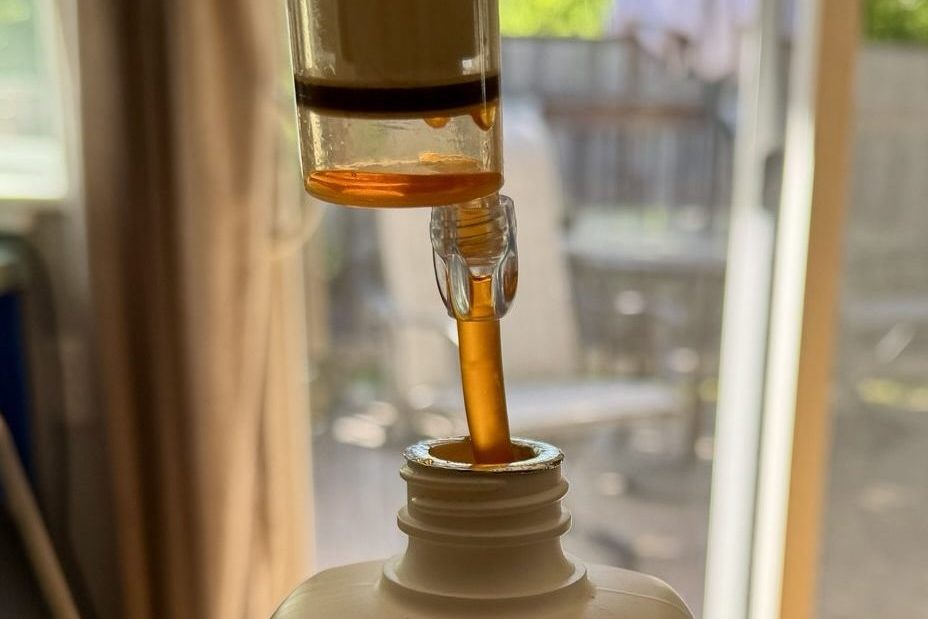
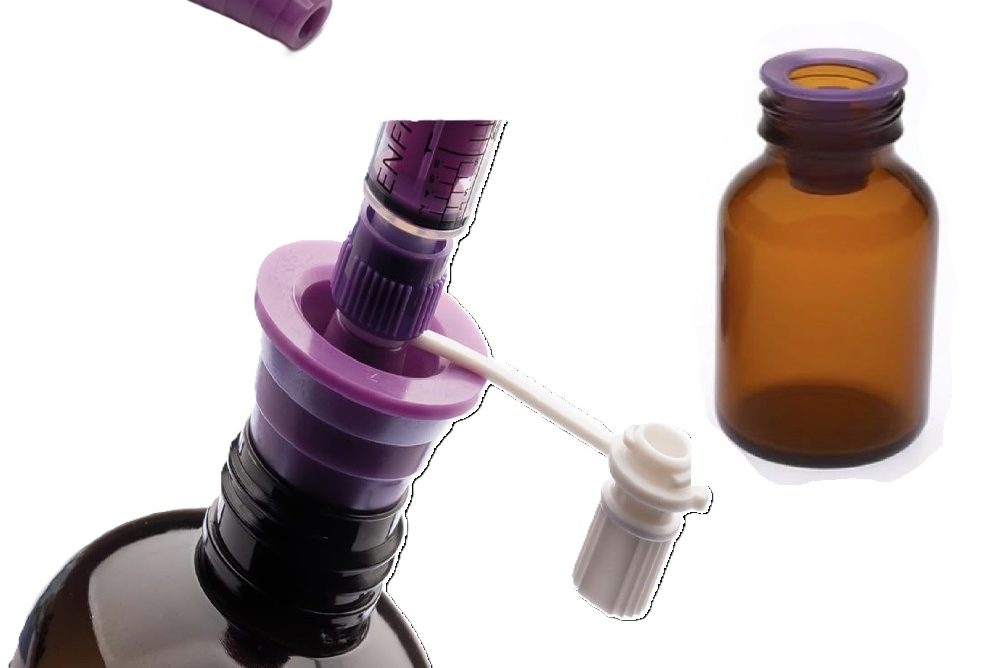
Using ENfit bottle adapter for small volumes:
Place ENfit adapter into medication bottle opening.
Screw ENfit syringe onto bottle (adapter).
Turn bottle upside down, syringe tip up, and draw medication to the correct dose.
Cap syringe and bottle.
Place into a labeled slot or ziplock bag with medication identifier.
Step 5: Wrapping Up
After you have finished filling your syringes wash the used cup bottoms and med/food straw with hot soapy water.
Tip: I find the cup bottoms dry best if you give them a couple hard shakes after rinsing.
Store your backstock of crushed medicine cups and pre-filled syringes where they won’t get knocked over, Refill syringes on a schedule that works for you.
Relax! You earned it!
When you go to take your premade syringes the powder likely will have settled. Turn the syringe upside down, with the cap on, and tap it on the palm of your hand until the powder is mixed into the water.
Once you have gotten used to your tube you’ll probably want to travel at some point. Vacations, weddings, camping, and other trips require new planning steps.
It is easier to travel when you bolus than pump. If you blend real food, you have more options when traveling. Same if you bolus Very High Calorie (VHC) Boost, ISOsource, Jevity, etc. The lack of bags, pumps, and equipment makes it easier but traveling on continuous feeds is still possible with a little extra accessorizing.
Though not required, it is recommended for all people with health conditions to travel with documents containing their basic medical information. This can includes a list of prescription medications, GP/oncologists/GI/etc. contact info or letters, medical history, allergies, etc. You never know when an illness or ER trip may happen.I always bring a spare replacement tube incase mine comes out!
Breathing Fresh Air
Hiking, camping, overlanding, and outdoor adventures
Want to get back in nature and go hiking, camping, or overlanding? It is more than possible. Let’s start with the basics:
Med Prep
Have all medications in syringes with caps and ready to administer when you will be out of your house. If possible for long trips, fill all syringes for the whole adventure ahead of time, including liquid medications. If you do not have enough syringes, pre-crush tablet medications and have them in tight containers.
How I Package Pre-crushed Meds
I use a Silent Knight pill crusher and leave the powder in the bag, fold it up, and place it in a 2oz jello shooter cup with a lid for transport. I write the med name (abbreviation) on the top of the bag and cup lid before crushing. I then place the cups flat in a zip lock to make an even layer. Stack in a small, hard shelled, “overstock meds” tote/case.
Keep two days worth of pre-filled medication syringes out and separate them into labeled ziplock gallon bags. If different color liquids or caps I will put them in the same bag; don’t put them together if they look similar or you may get confused! Place the rest of the medication syringes into separated, labeled, gallon ziplock bags and store them in a small, hard shelled, “overstock meds” tote/case.
Place the two days worth of labeled bags of medication syringes into your “food and medicine bag”. I like to use a semi-hard camping lunch box for easy access and durability.
Food
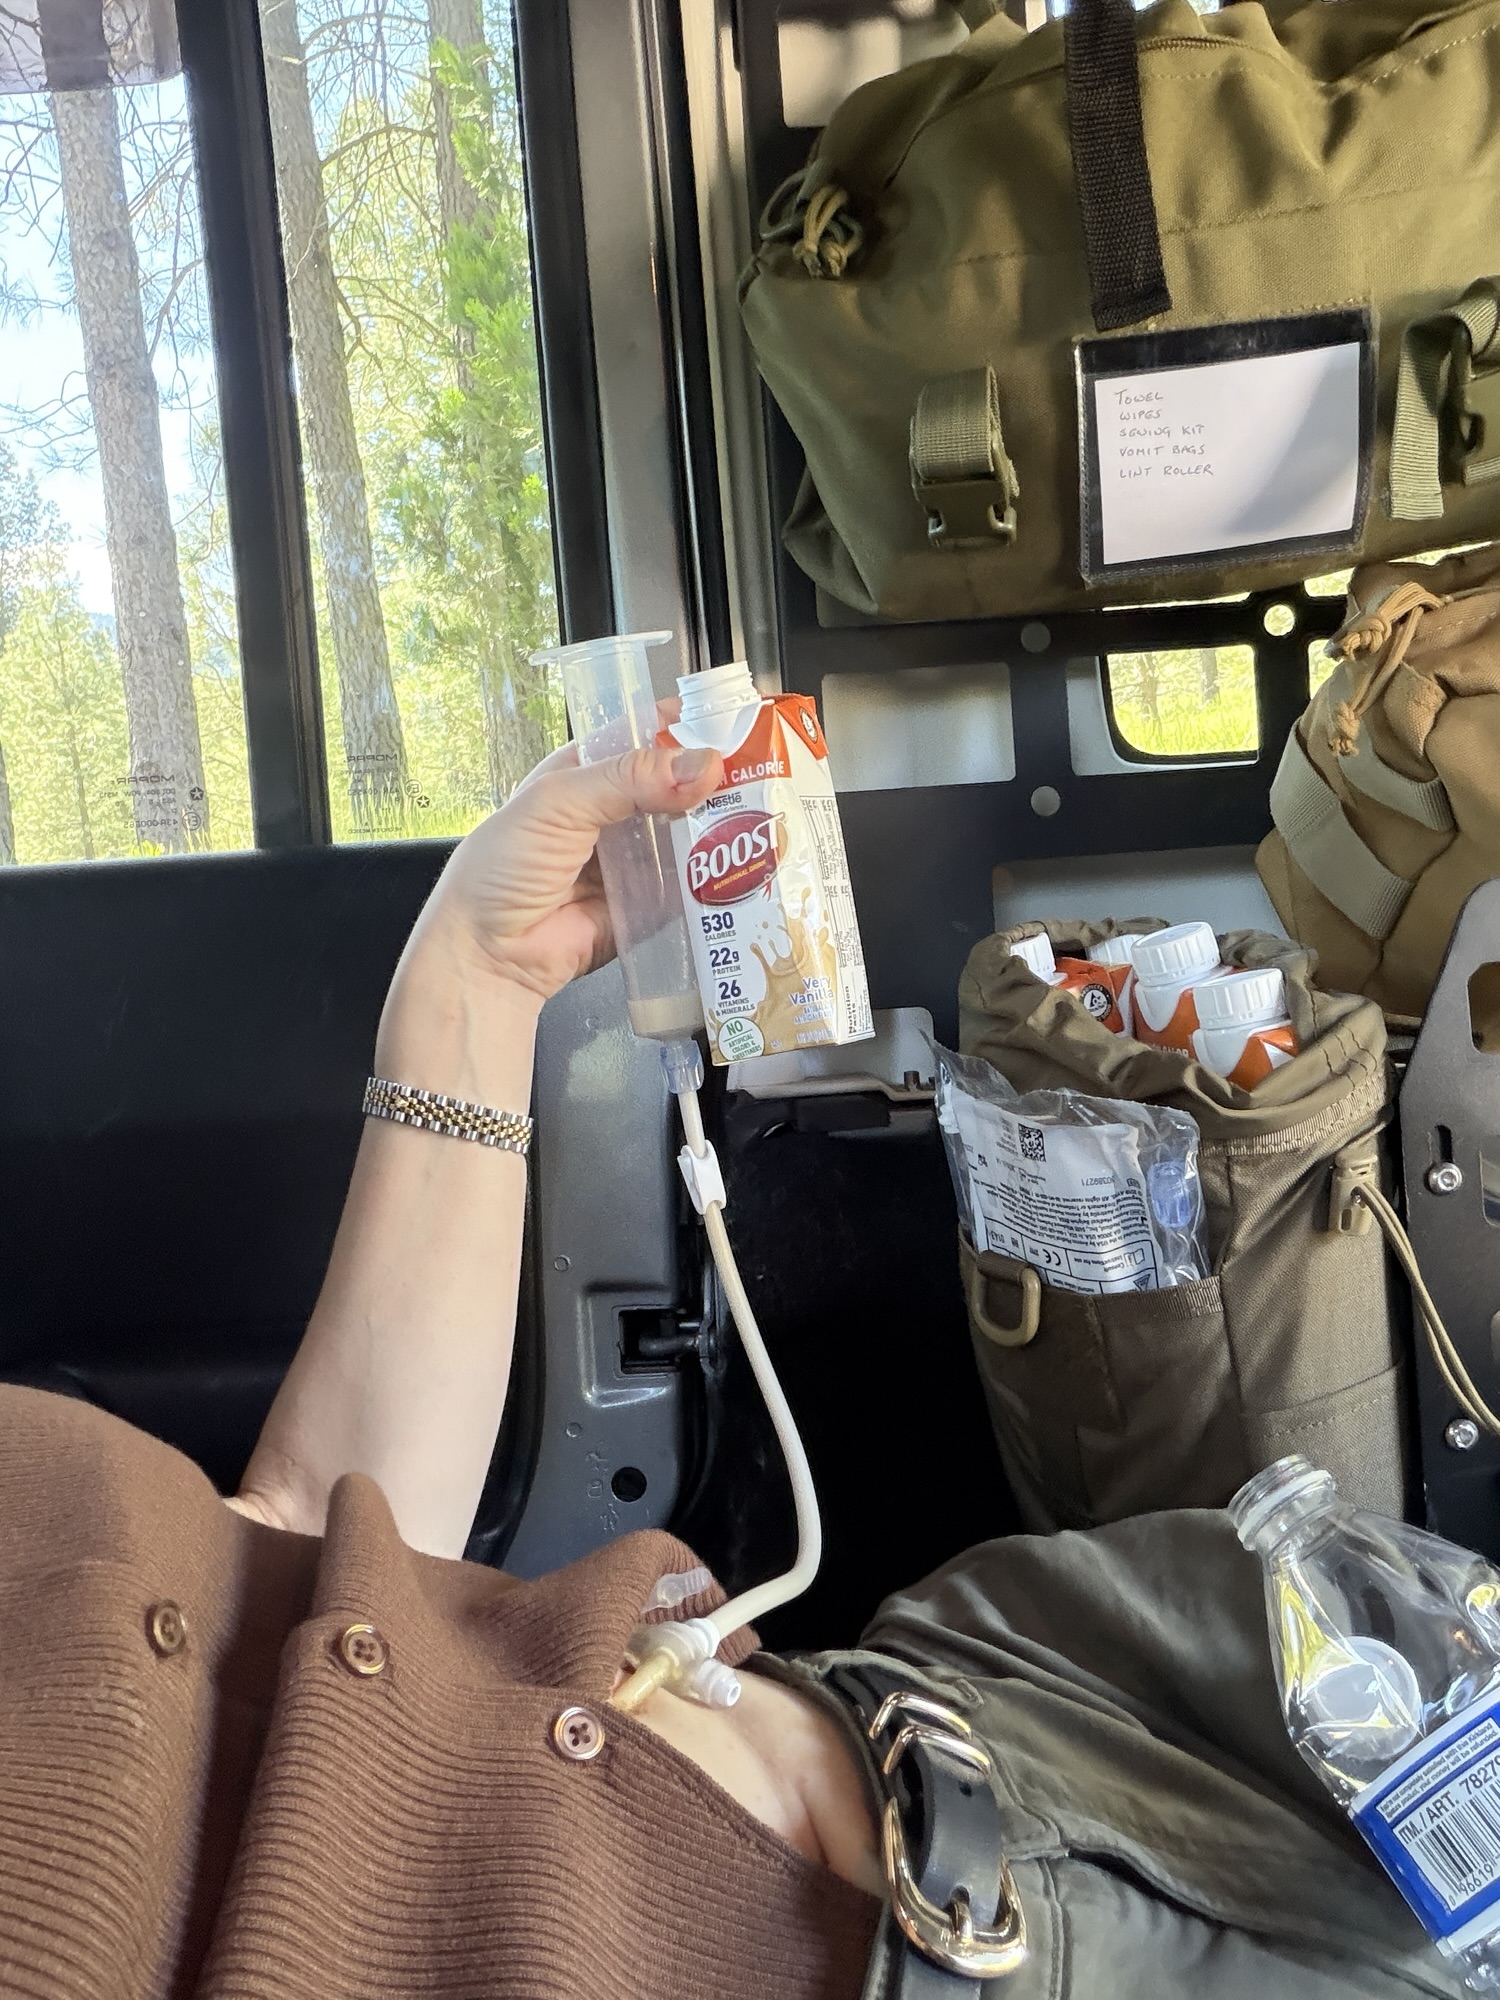
It is easiest to bring all your food with you premade and without needing refrigeration. Even those of us that do blended real food often gravity bolus Very High Calorie (VHC) Boost, ISOsource, or Jevity from cartons when mobile due to the size and weight compared to most formulas or the inconvenience of bringing a blender, cooler, pump, etc. when outdoors. You can flush by pouring water into the syringe body before and after gravity bolus feeding.
I actually found when overlanding and camping (drive to location) the weight, size, ease, and minimal cleaning required to gravity bolus the cartons of VHC Boost was easier than cooking and bring food to eat. I look at it as an MRE I don’t have to taste *wink*… Small upsides, I try and find them. When day hiking I found bringing a few VHC Boost was the same as bringing a sandwich.
You also have the option of pressure bolusing other formulas and meal replacements with calorie additions like you would blended food. This is not as simple as the cartons but gives you more control over the ingredients. I recommend a cordless magic bullet or other electric protein drink mixer to ensure powder and additives are well mixed (to prevent clogs).
Use a water dedicated syringe to flush before and after meals if pressure bolusing. I recommended having a separate water flushing syringe for each day. Use a hard cup (I use a magic bullet cup since it is the right height) to store the water syringe for flushing reuse and keep in your Food and Medicine Bag. This replaces the pop-up cup. I find continuous feed extensions are best when doing medications only.
See Suggested Food and Water Additives
BENEPROTEIN (Mix and pour into a water bottle and use as your flush water during the day)
Unjury High Protein Meal Replacement (The calories and fat is low but the nutrition and protein is high – good as an additive only to high calorie base)
I don’t have a J-tube, but based on other traveler’s experiences, using a flexible feeding schedule on vacation can be a useful tool.
Whether camping or in a sleeping room, you want to be careful of food outside in the sun. If you’ll be out in the sun while you hangout around the lake or pool, you may want to run water through the pump during the warmer parts of the day and feed overnight. You can have a small feed earlier if needed.
Food and Medicine Bag (Bolus)
I find the following items are always good to have in my food and medicine bag/backpack. On longer trips I fill it two days worth of supplies at a time.
If you are just going for a hike for the afternoon or out to an event, downsize the Food and Medicine Bag to just the supplies for the number of meals you need and medications you will need to take until you get home, bring gloves and hand sanitizer so you don’t have to worry about finding somewhere to wash up (leave the soap at home) and eat on the go.
Trip to doctor’s appointment (other items in bag)
TIP: You can flush your meds by using the same med syringe after you administer the medication and filling it from the pop-up cup. This also clears out any leftover medication residue in the syringe.
TIP: You can prime an extension (fill it with water so you don’t get air in your stomach) by placing the tip in water and pulling back with a filled med syringe. Then clamp the extension and disconnect the syringe. “Burp” the syringe to remove the air from the syringe before administering.
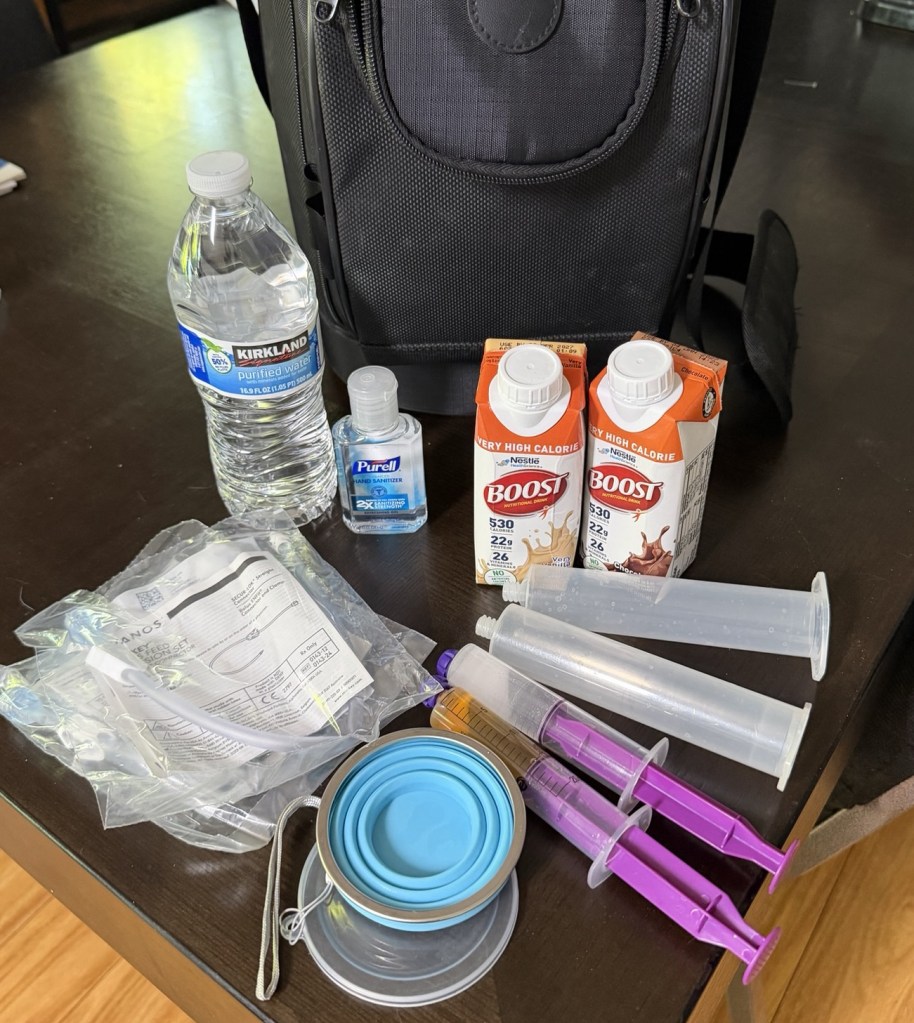
Items
Pre-filled medicine syringes
2 days worth of 60ml bolus syringes*
2 days worth of extensions (one per meal)*
Pop-up camping cup (or water flushing syringe and cup)
Gloves/hand sanitizer <- If you can’t clean you hands well at meal time
Camping towelettes or equivalent
Soap leaves/hand soap/wash wipes
Alcohol wipes
2 days worth of food cartons
2 chucks (pee pads) to place on dirty surfaces
Empty gallon ziplock bag for “dirty” syringes and extensions (rinse well before putting in bag)
2 days worth of food
Flush water (refill throughout the day as needs)
*If using a pump or other feeding set up you will want to bring two sets of equivalent daily supplies.
Continuous Feed Backpack
Feeding Pump Backpacks eliminate the need for a pole and are specifically made to allow you to be active while maintaining proper pump positioning. You likely won’t want to carry around two days of formula on your back… HEAVY! So assume you will be refilling your backpack based on how much weight you are willing to carry.
Carry an equivalent amount of supplies and medications to match the amount of formula you are carrying. I recommend going with a medium to larger size if you will be away from base camp for awhile.
It is recommended to always have spare batteries in your Feeding Pump Backpack and a spare pump in your Overstock Meds container or Feeding Pump Backpack if there is space.
Overstock Meds
I recommend packing additional medication items in a latching, hard shelled (plastic/metal), tote or case.
Extra pre-filled syringes in labeled gallon bags (to refill 2 Day Food and Medicine Bag)
Crushed tablets.
I use a Silent Knight pill crusher and leave the powder in the bag, fold it up, and place it in a 2oz jello shooter cup with a lid for transport.
I write the med name (abbreviation) on the top of the bag and cup lid before crushing.
I then place the cups flat in a zip lock to make an even layer.
Stack in layers at the bottom with syringes on top.
I always bring at least one extra days worth of meds pre-filled or pre-crushed.
Medication in prescription bottles. (Incase of emergency or spill)
Hand pill crusher (Incase of emergency or spill)
Extra 2oz jello cups w/o lids to mix incase of emergency or spill
Pill cutter (if you need one for your meds)
Water syringe with markings for meds (5ml, 10ml, 15ml, etc.)
Extra gloves and alcohol wipes
“med straw” (extension with tube attachment cut off and ENfit attachment left on tube)
Spare replacement tube. In the event of yours coming out you want to have one when you go to the ER!
Extra Food
Pack you overstock formula/food however you see fit. Avoid extreme temperatures and placing in direct sunlight. Make sure it isn’t going to get damaging during transport.
Day to day cleaning and stoma care supplies
Having a first aid kit with your day-to-day cleaning supplies and your other hygiene products handy is a must for travel, particular outdoors. It is essential that stoma wound care is kept up on even when camping.
Don’t forget your essential medical, stoma care, and hygiene supplies!
Gauze, split gaze and tape or adhesive sponges
Transparent wound dressing
Saline/wound cleaner, other stoma cleaning and care items
Extra gloves, hand sanitizer, chucks* (pee pads) *Incase you don’t have a clean eating/med taking area and keeps medication dust off surfaces when crushing
Hand washing soap and towels
Dish soap, bottle brush, dish pan for cleaning
Extra extensions, syringes (continuous feed and/or bolus).
I bring enough syringe bodies and extensions to last the trip if possible to avoid heavy washing, but packing four days worth for long trips (two in uses, two being washed) is usually really easy to manage.
Caps, valves, hanging bags, and other feeding and medication administration supplies
Spare pump, extra batteries
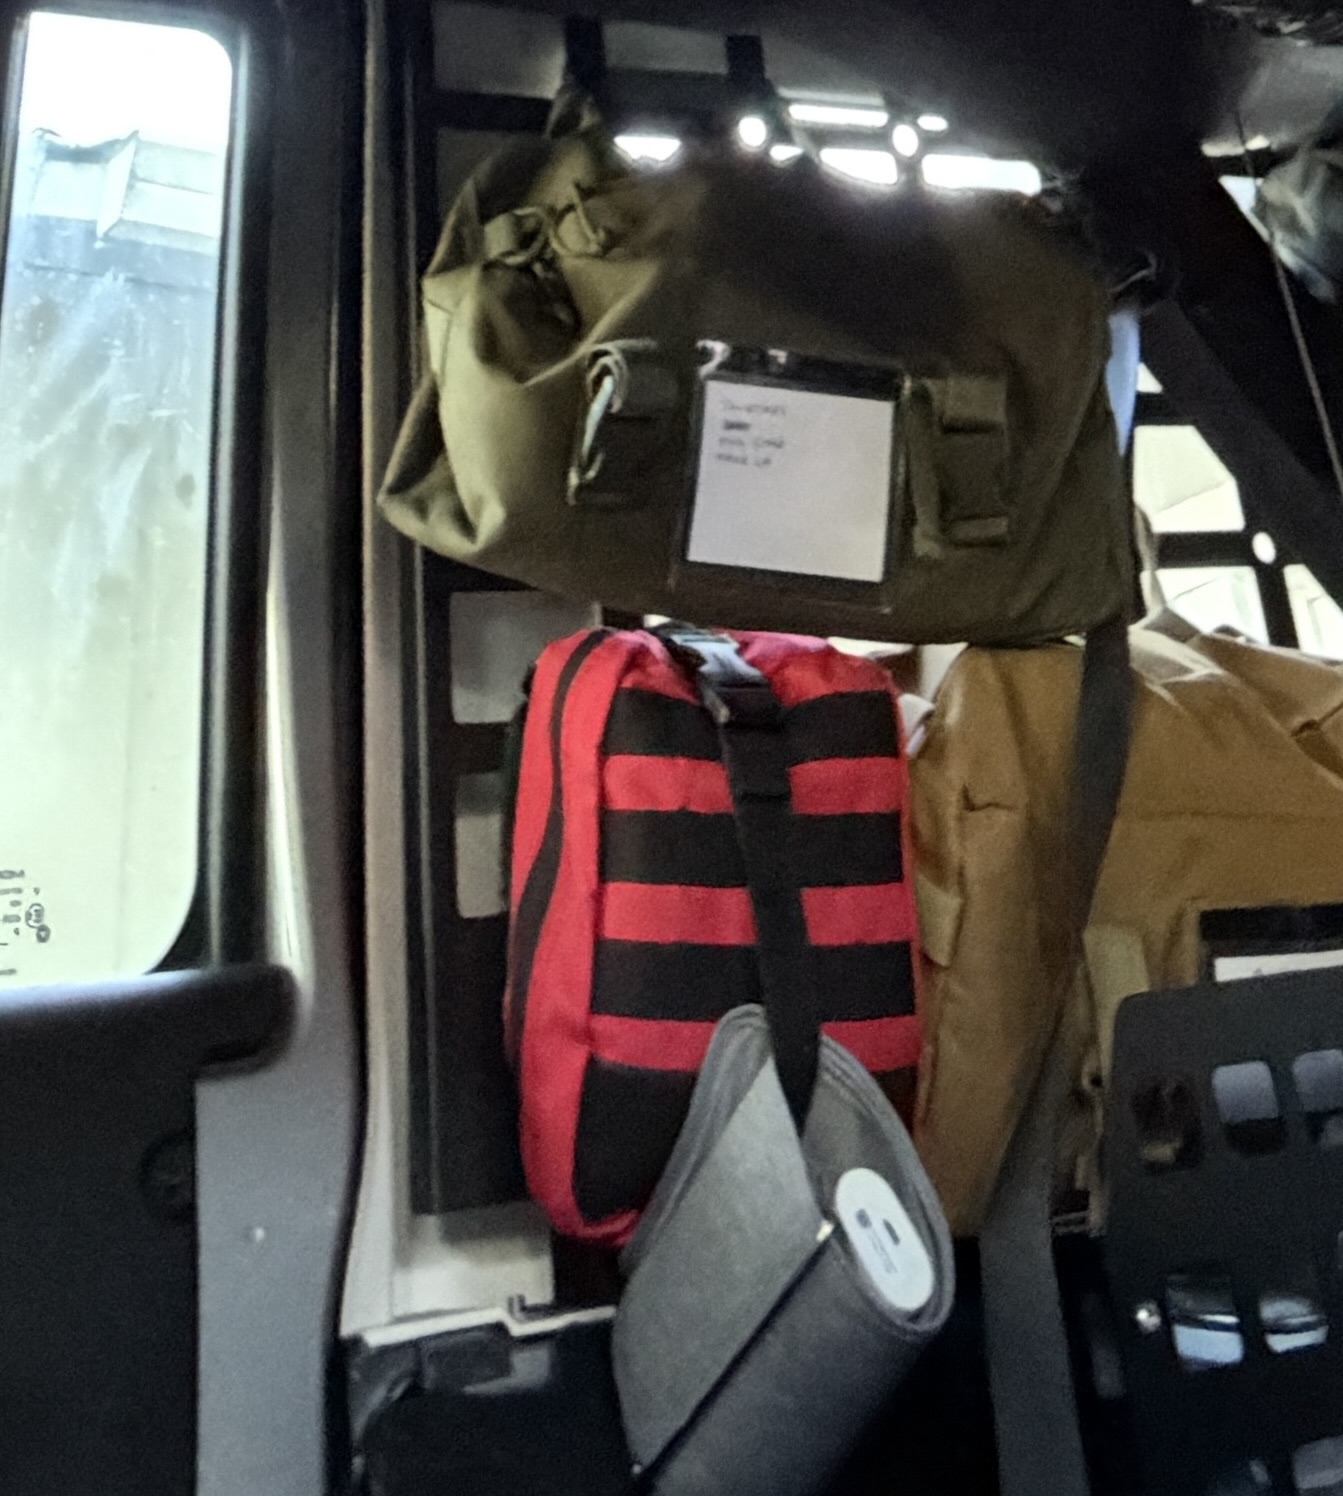
I pack mine and Sam’s belongs in molle-bags and hang them on steel molle in my Jeep to travel/overland but you do you!
Spread Your Wings
Flying with TSA
If you are flying domestically in the USA and going through TSA you can travel under the Disabilities and Medical Conditions. I have tried to summarize the information that is applicable to feeding tubes (as of May 2026) but the full current TSA Disabilities and Medical Conditions can be found at:
Formula falls under medications and is excluded from the 3-1-1 liquid rule for carry on’s and your feeding and stoma care supplies are considered medical items.
You can have a second, free, carry on bag for medical items and medications. These items should be separated from your other personal carry on items or it will not meet the Disabilities and Medical Conditions.
The following is from the TSA website and is generally is the most relevant:
Medications
Medications in pill or other solid forms must undergo security screening. TSA officers may test liquids, gels or aerosols for explosives or concealed prohibited items. Click for more details.
You can facilitate this screening by clearly labeling medication.
Medication can undergo a visual or X-ray screening and may be tested for traces of explosives.
Inform the TSA officer if you do not want your liquid medication to be screened by X-ray or opened. Additional steps will be taken to clear the liquid, and you or the traveling guardian will undergo additional screening procedures, which may include AIT screening, a pat-down, and additional screening of your carry-on property.
If officers are unable to use screening technology to clear these items, you may be asked to open them for Vapor Analysis. Screening will never include placing anything into the medically necessary liquid.
3-1-1 Liquids Rule Exemption
TSA allows larger amounts of medically necessary liquids (formula, liquid medications, wound cleaning fluid), gels (skin creams/gels), and aerosols in reasonable quantities for your flight. Click for more details.
*I will bring a minimum 2 days just incase of an unexpected delay and explain I am unable to purchase formula if a flight cancellation happens, if questioned (rarely happens). For short trips you may just bring all your “food” with you.
You must declare them to TSA officers at the checkpoint for inspection.
Remove medically necessary items from your regular carry-on bag if you have them mixed in there, and place them in a separate bin or bowl.
If a medically necessary liquid, gel, or aerosol alarms additional screening will be required. If the alarm cannot be resolved, the item may not be allowed.
Accessories
All items, including supplies associated with medically necessary liquids such as ice packs, bags, pumps and syringes must be screened before they will be permitted into the secure area of the airport. Click for more details.
Ice packs, freezer packs, gel packs and other accessories may be presented at the screening checkpoint in a frozen, partially frozen or melted state to keep medically necessary items cool.
Don’t forget your essential medical supplies, which includes feeding (life support), taking medications, and stoma care.
Gauze, split gaze and tape or adhesive sponges, clear wound dressing, saline/wound cleaner, other stoma cleaning and care items
Extensions, syringes (medication and bolus), caps, hanging bags, spare pump, extra batteries and other feeding and medication administration supplies.
Medication mixing cups, pill crusher, pill cutter, “med straw” (extension with tube attachment cut off and ENfit attachment left on tube) and other medication preparation supplies.
Gloves, hand sanitizer, chuck* (pee pad) *Incase you don’t have a clean eating/med taking area and keeps medication dust off surfaces when crushing.
Spare replacement tube incase of emergency.
Bandages and Dressings
Inform the TSA officer if you have a bandage or dressing. Click for more details.
Your bandage, compression sleeve or dressing is subject to additional screening, including inspection, hand-held metal detector screening, a test of your hands and a test of the medical item device for any trace of explosives.
Screening in TSA PreCheck® Lanes Additional screening is required if your bandageor dressingalarms in the Walk-through Metal Detector (WTMD) or AIT. If required, the TSA officer will direct you to conduct a self-pat down of the medical item, test your hands for any trace of explosives and conduct hand-held metal detector screening on the medical item.
Medical device attached to your body
Inform the TSA officer about the location of medical device attached to your body. You will not be required to remove medical devices attached to your body. Click for more details.
Disconnected devices may be screened by X-ray. Inform the TSA officer if you do not want your device screened by X-ray. Alternative screening will be conducted.
If your medical device is attached to your body, the device is subject to additional screening, to include a self pat-down of the medical device and a test of your hands for any trace of explosives.
Screening in TSA PreCheck® Lanes Additional screening is only required if your medical device alarms in the WTMD or AIT. If required, the TSA officer will direct you to pat-down the medical device and will test your hands for any trace of explosives.
Contact TSA Cares at 1-855-787-2227, 72 hours in advance to request the assistance of a Passenger Support Specialist (PSS) at the checkpoint, to make it as painless as possible to get through security. They will also let you know what to expect and answer any questions about what and how much you can bring. If a PSS is not available, you may ask for a Supervisory TSA Officer at the checkpoint.
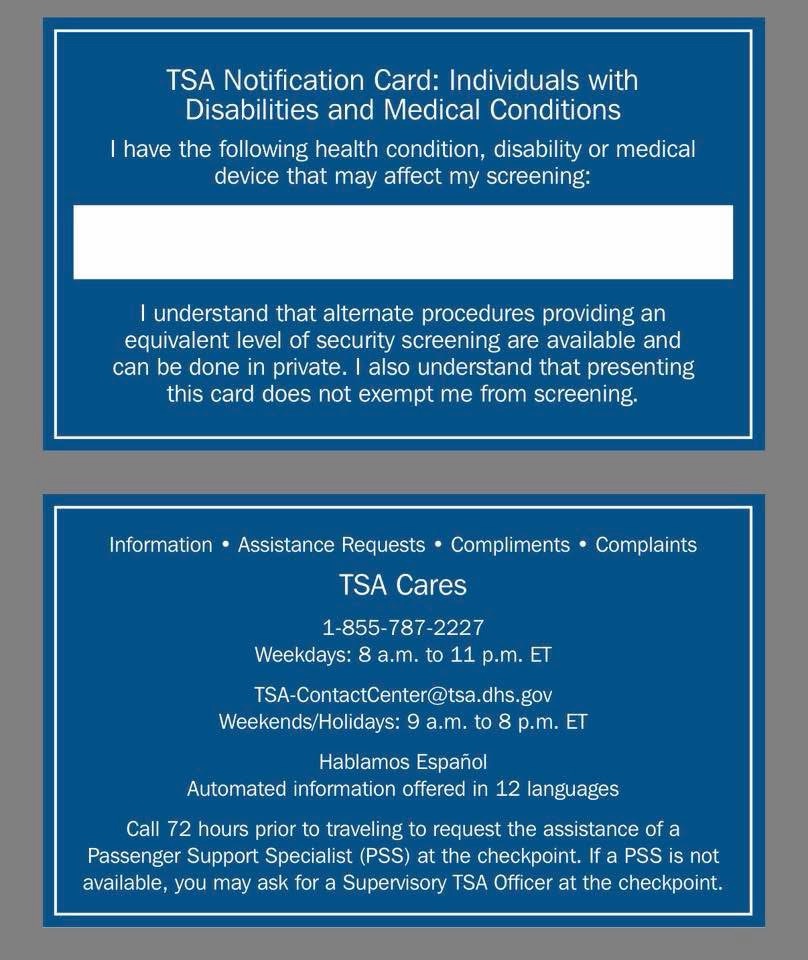
You may inform the TSA officer of your disability or medical condition verbally, by using the TSA Notification Card or by providing medical documentation (letter from doctor).
Though not required, it is recommended to bring a TSA Notification Card: Individuals with Disabilities and Medical Conditions as it has good “who to contact” information on the back if you run into trouble.
Contact the Airline, Flying Agent, or Travel Company
It is recommended to contact the airline, your flying agent, or travel agent as soon as you get your tickets, so that they can smoothly accommodate you on the flight. Some request may need to be made by submitting a request, so allow yourself adequate time.
This may do things such as allowing them to board you early so you can situate yourself, giving you seating with adequate space to accommodate supplies and feeds, inform you of weight allowance, etc.
If you run into issues at the gate, you can ask to speak with a complaint resolution official (CRO), which all airlines should have available to handled disability issues.
Cruise Ships
If you will be connecting with a cruise ship they will have their individual policies. You will need to contact your travel agent or the cruise ship for information on what is required.
Based on another traveler’s experience, they ask you to have specific cruise insurance, plus up to 2 to 3 weeks of medication incase of problems being able to disembark.
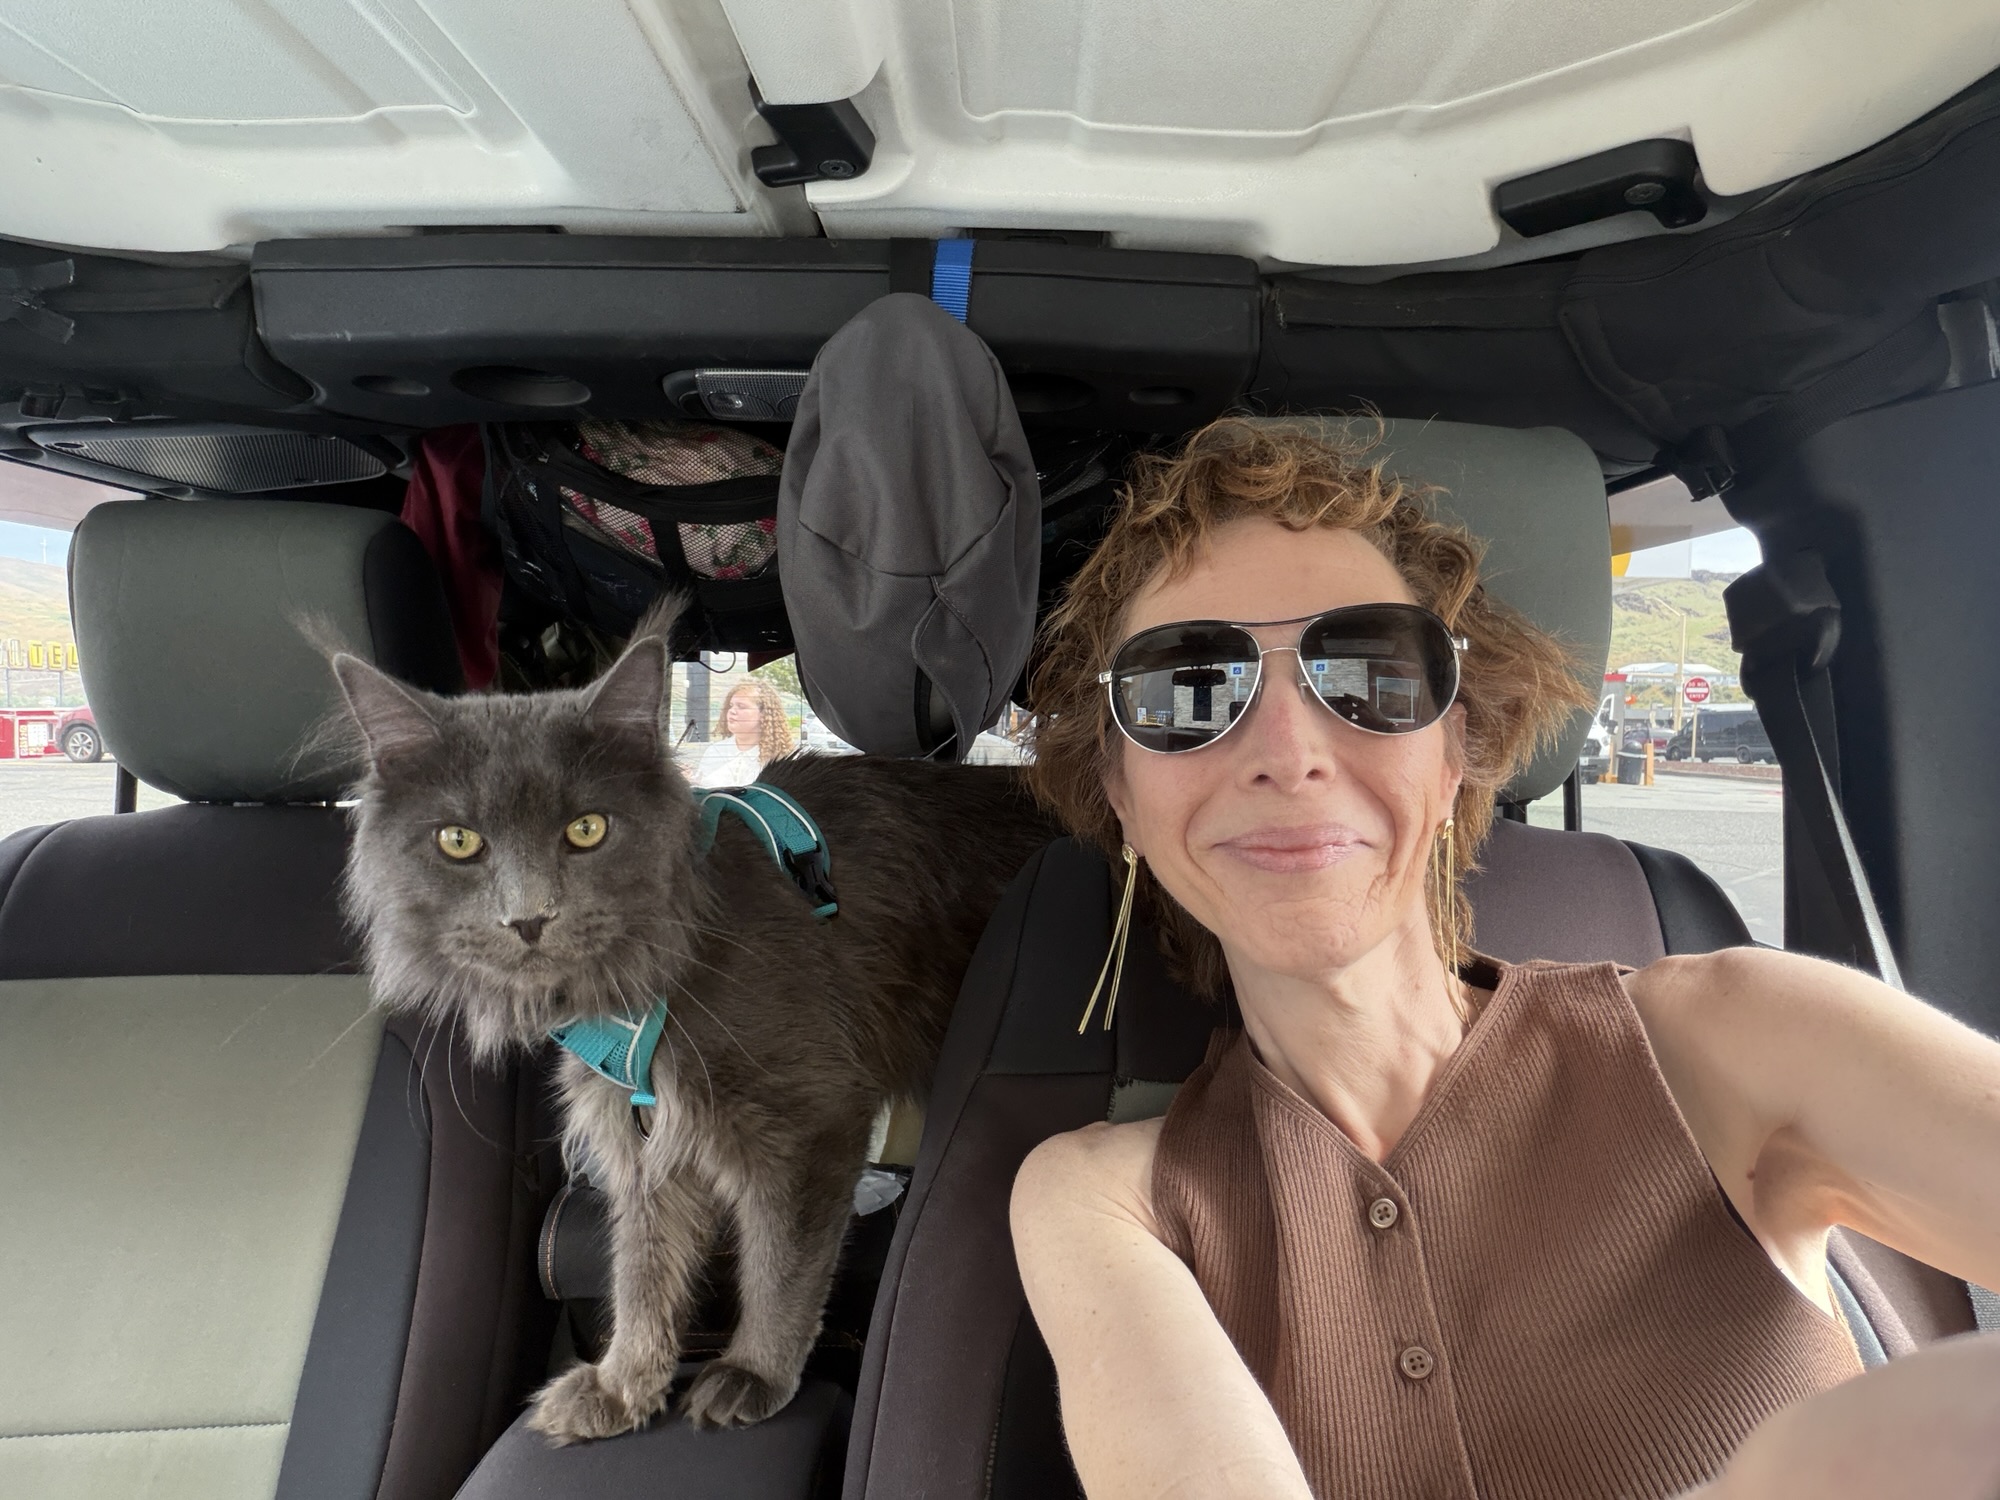
It was a crisp Saturday afternoon and my husband and I were enjoying a cup of coffee outside. What could go wrong? Cats!!! When you have 4… it’s always cats!
Sam, my sweet little cooing ball of one-year-old kitten puffiness, was running around the backyard. I playfully picked him up as ran past, giving him struggle snuggles. Then he launched off my stomach and all hell broke loose.
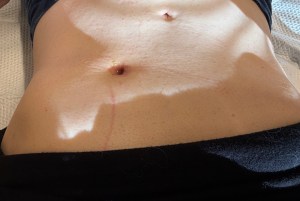
I felt a knot in my stomach, literally. Like a marble in my abdomen wall. My stoma hurt!
I lifted my shirt to see my mic-key button almost out. Sam had yanked it forward and his claw had gone IN THE STOMA AND POPPED THE BALLON! It is 12:50pm
So up and to the ER we go. Jason grabs Sam and puts him in house. I go clean off with saline and cover up with gauze to stay somewhat hygienic. Shoes on. In the car. Go. 1:05 pm
We went to the ER of the hospital that installed my Mic-key button. I told them my feeding tube got pulled out by my cat and he popped the balloon, and it needs to be replaced immediately before the stoma closes and that
that I was told to head straight to the ER if it came out, so that they could keep the track open because it starts to heal right away. *wink* Between my speech and the oddness of what I said I did have to repeat myself. LOL! We arrived and check in at 1:25pm.
At 5:30pm they finally took me back, they had never seen a mic-key button before. Went on a hunt all over the hospital and came back with a regular G-tube dangler. It was what they had.
Emotionally this was extremely hard for me! I have severe trauma around my g-tube experience, particularly with NG tubes and danglers. When they went to install it I ended up standing on the hospital bed on my tippy-toes, in the corner of the room, crying, and not letting anyone touch me. I finally got myself pulled together and was prepared to have them install the G-tube. It was 6:30pm.
It wouldn’t go in… the stoma had closed too much! They told me the stoma would need to be dilated with the IR department and there wasn’t anything they were comfortable doing at that point. Go home and call IR on Monday to schedule. It was Saturday. I was tears… I’m 105lbs, have epilepsy, and am NPO other than water and thin liquids… how was I going to eat or take meds? Was there anything they could do? Please!?!?!
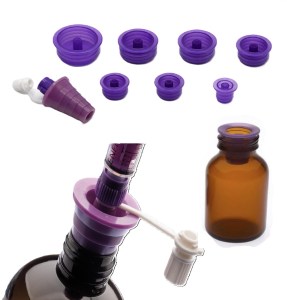
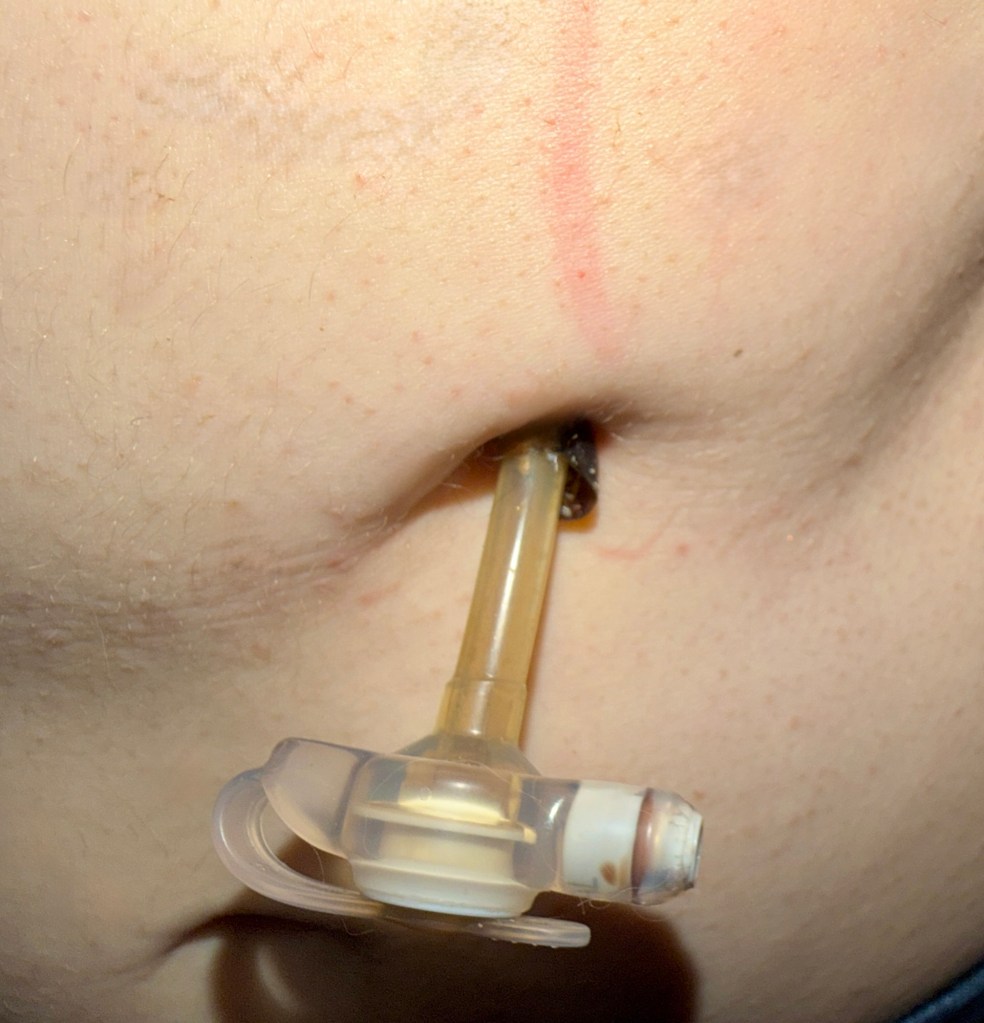
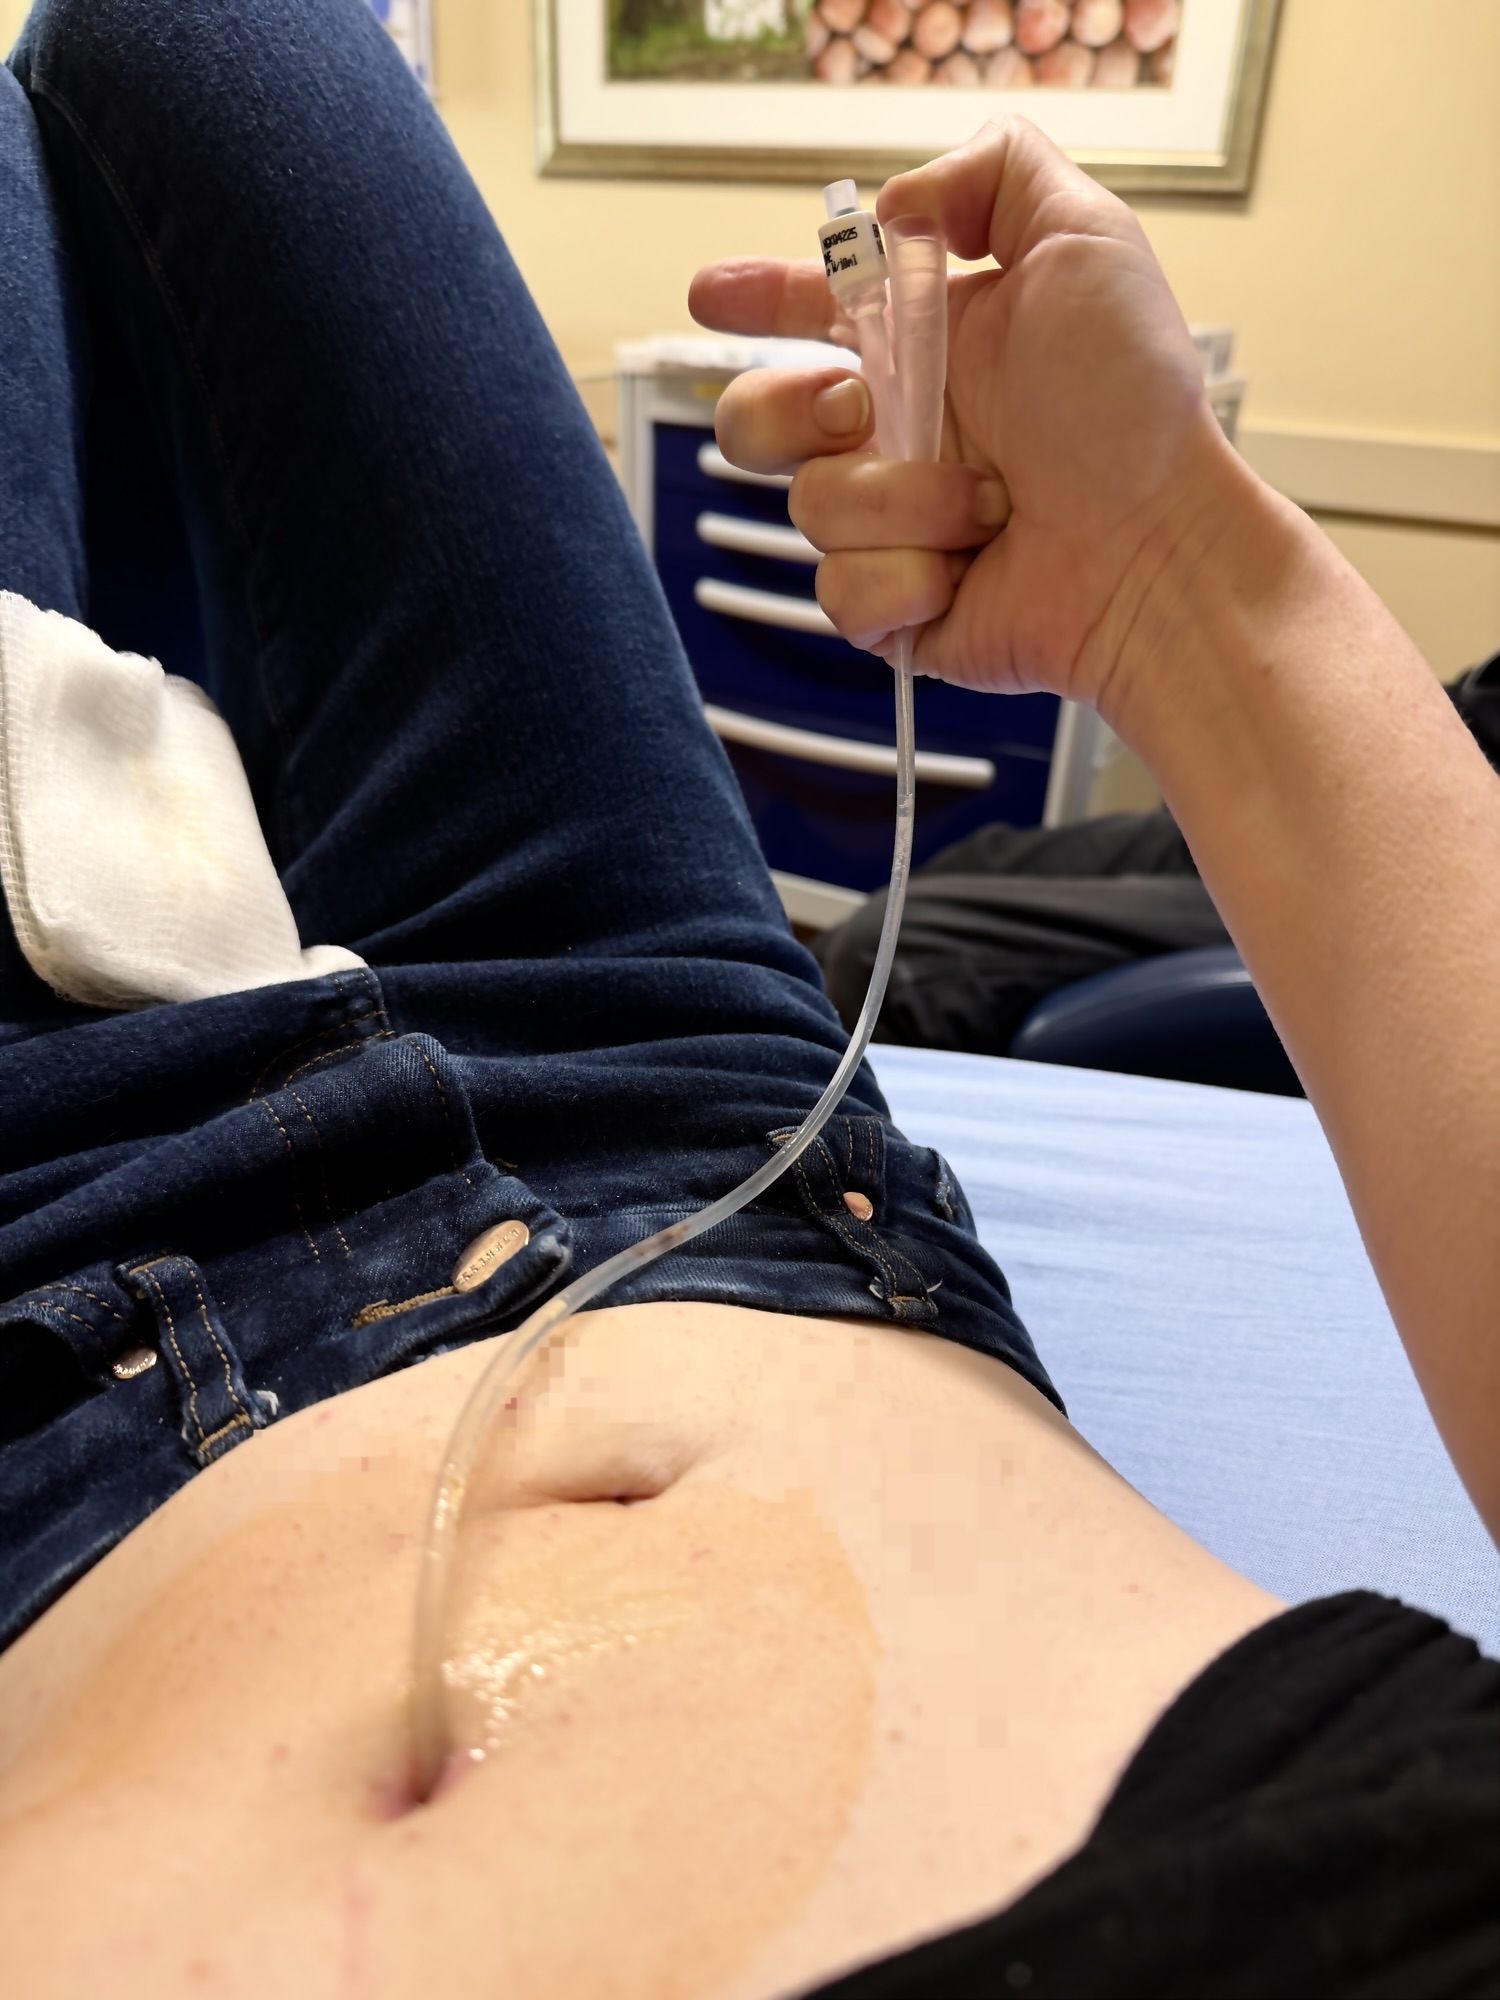
So I ended up with a catheter.
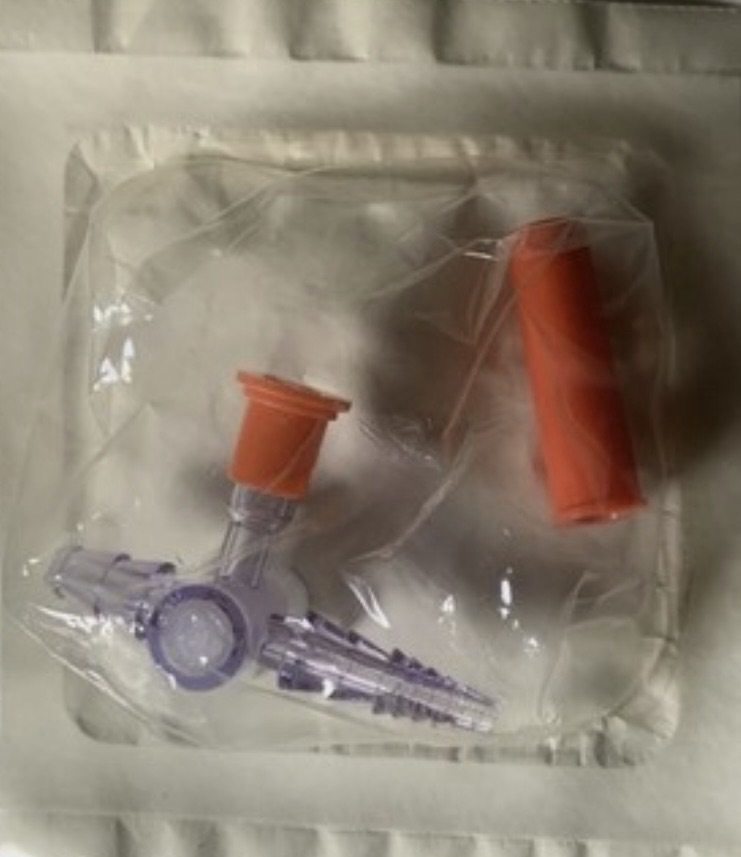
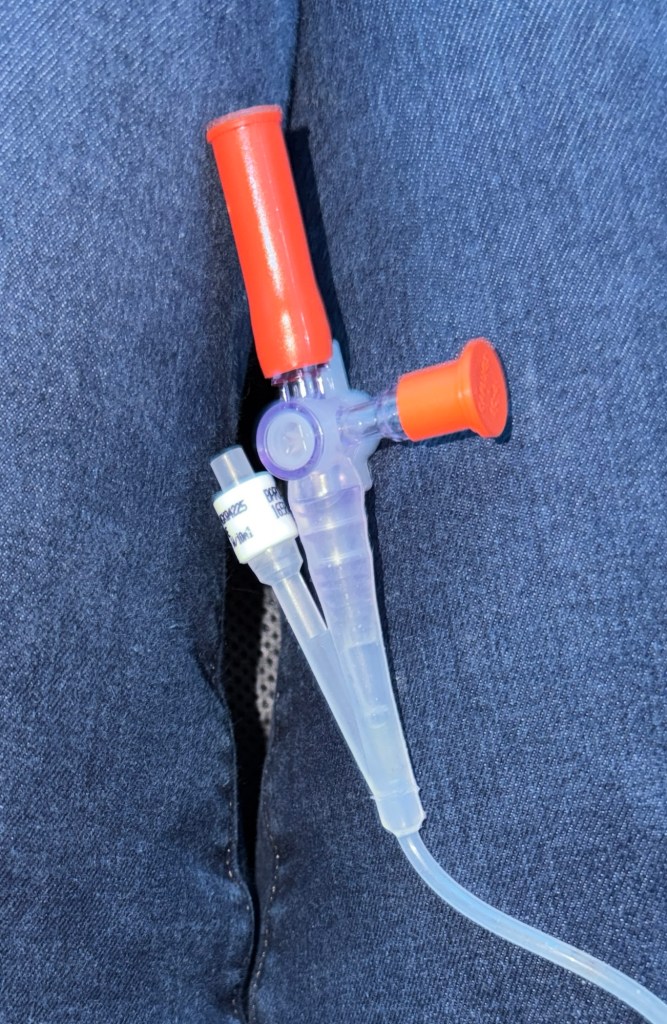
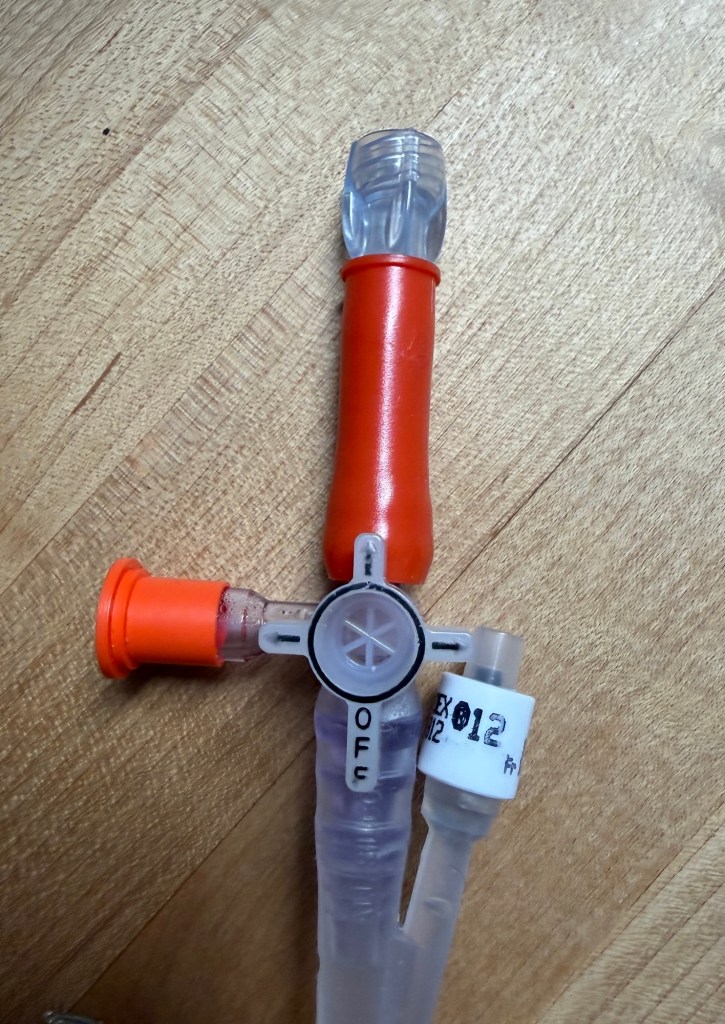
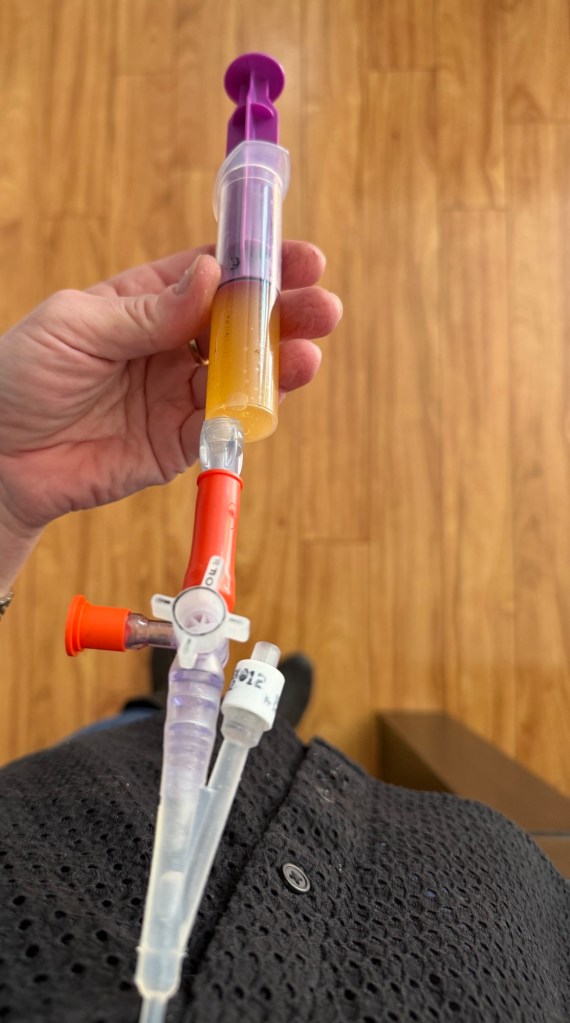
No outside stopper, so it would wiggle and travel if I didn’t tape it down. Shot food straight up into my throat the first time I used it. If too vigorous on flush it whipped around like a fire hose. Also no cap, and I use ENfit syringes. So they gave me this valve adapter…
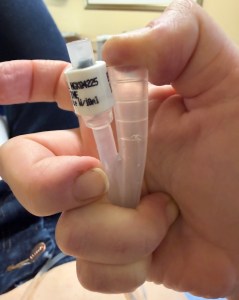
So we cut the end off of an extension and pushed it through the hose connector part to make an ENfit connector. It was the medical equivalent of duck tape and zip ties but it worked! Held until I got my stomach dilated and a new mic-key button installed on Tuesday.
Made me appreciate the small size of the buttons. I have since had my DME send me a spare to keep on hand, so that I have it incase of an emergency. I bring a spare mic-key button with me when I travel now. I also keep Christmas tree adapters in my to-go bag, so that I can use my ENfit syringes in an absolute worst case catheter connection situation.